A Swing-Out Screwdriver Arm for 1/4" Pegboard
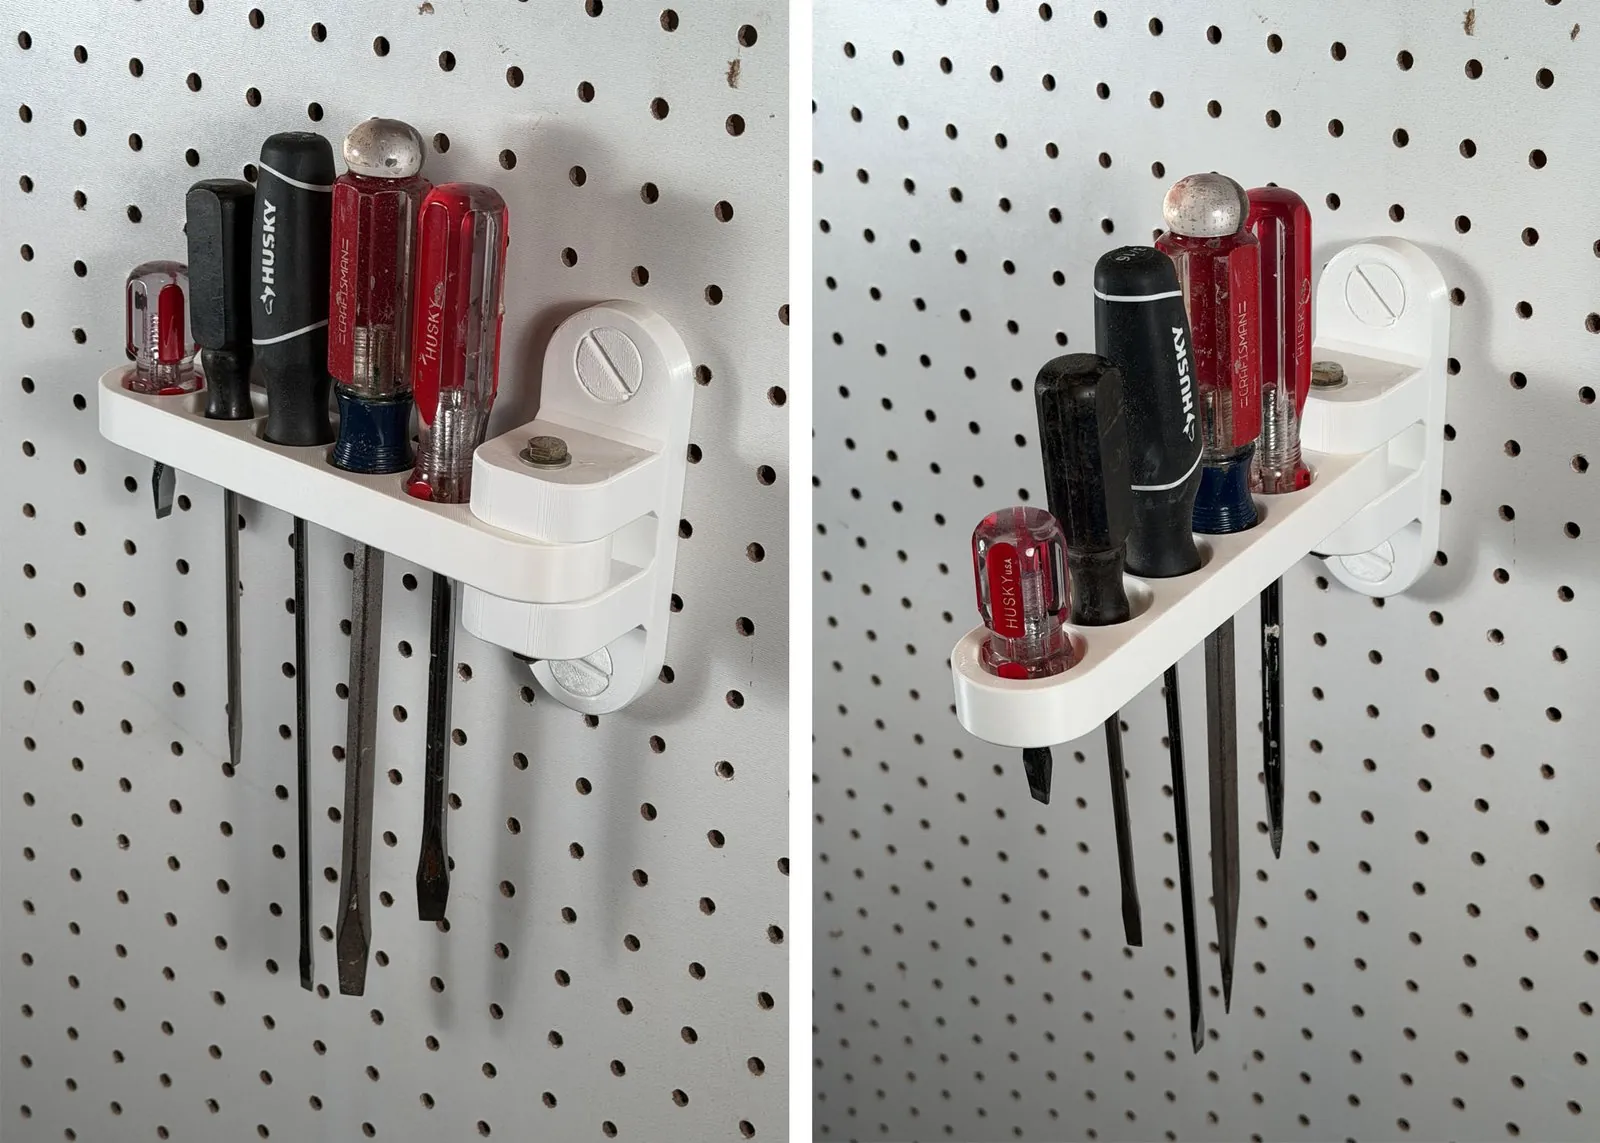
A screwdriver rack with holes holds drivers better than one with slots, because they can't slide out the front. The catch is that you have to lift each driver straight up to get it out. That means leaving an empty strip of board above the rack, about as tall as your longest screwdriver. That's wasted pegboard.
This rack is on a hinge. Swing it out from the board and the drivers lift out with nothing above them in the way. Swing it back flat against the board, to either side, and you can hang other tools right above it.
Download the arm, hinge mount and screws free on Printables
The files are on Printables: STEP files for the arm, the hinge mount and the screw, and a 3MF with my print settings. I've also entered it in the Printables Designer Challenge: Pegboard Wall Organizers.
Swing it out, fold it away
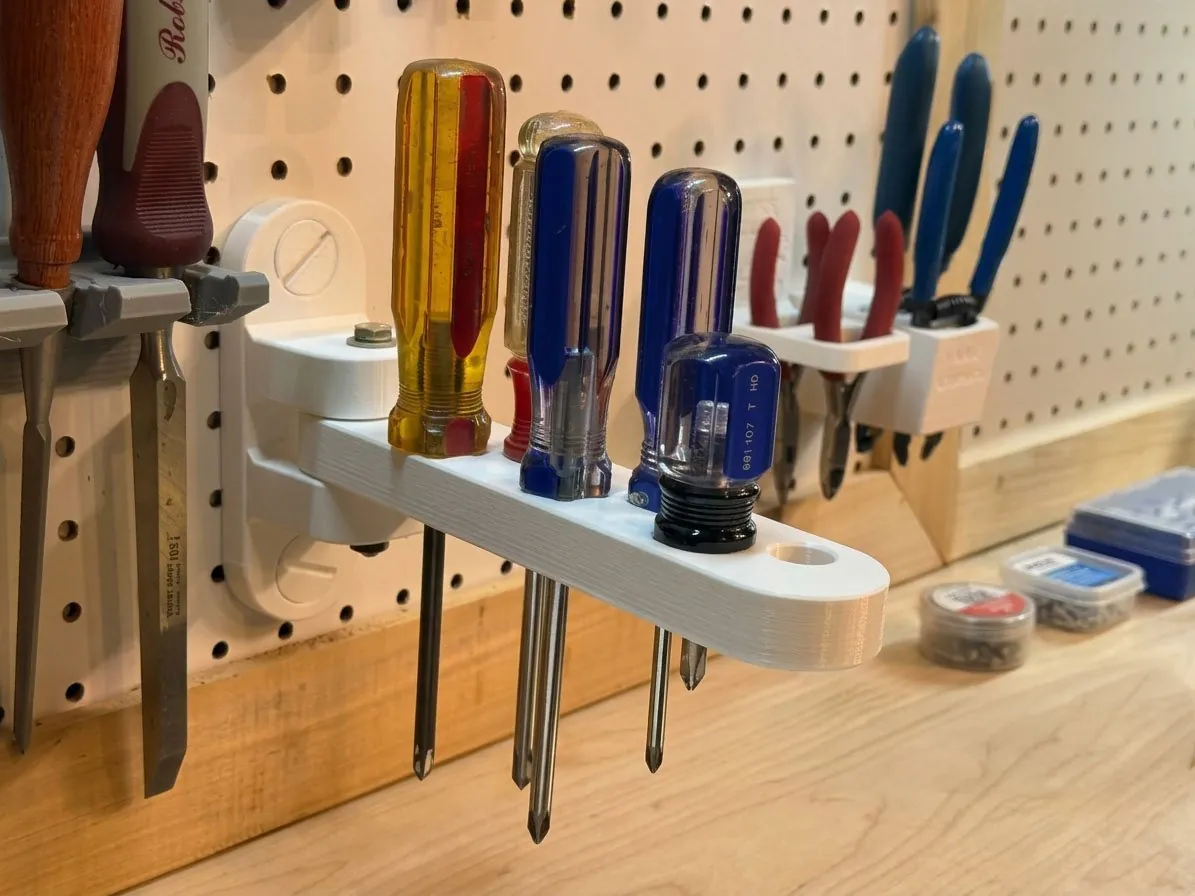
The arm swings 90° either way from straight out, so it folds flat against the board to the left or the right. When I need a driver, I swing the arm out and lift the driver out. When I'm done, I drop it back in and fold the arm away.
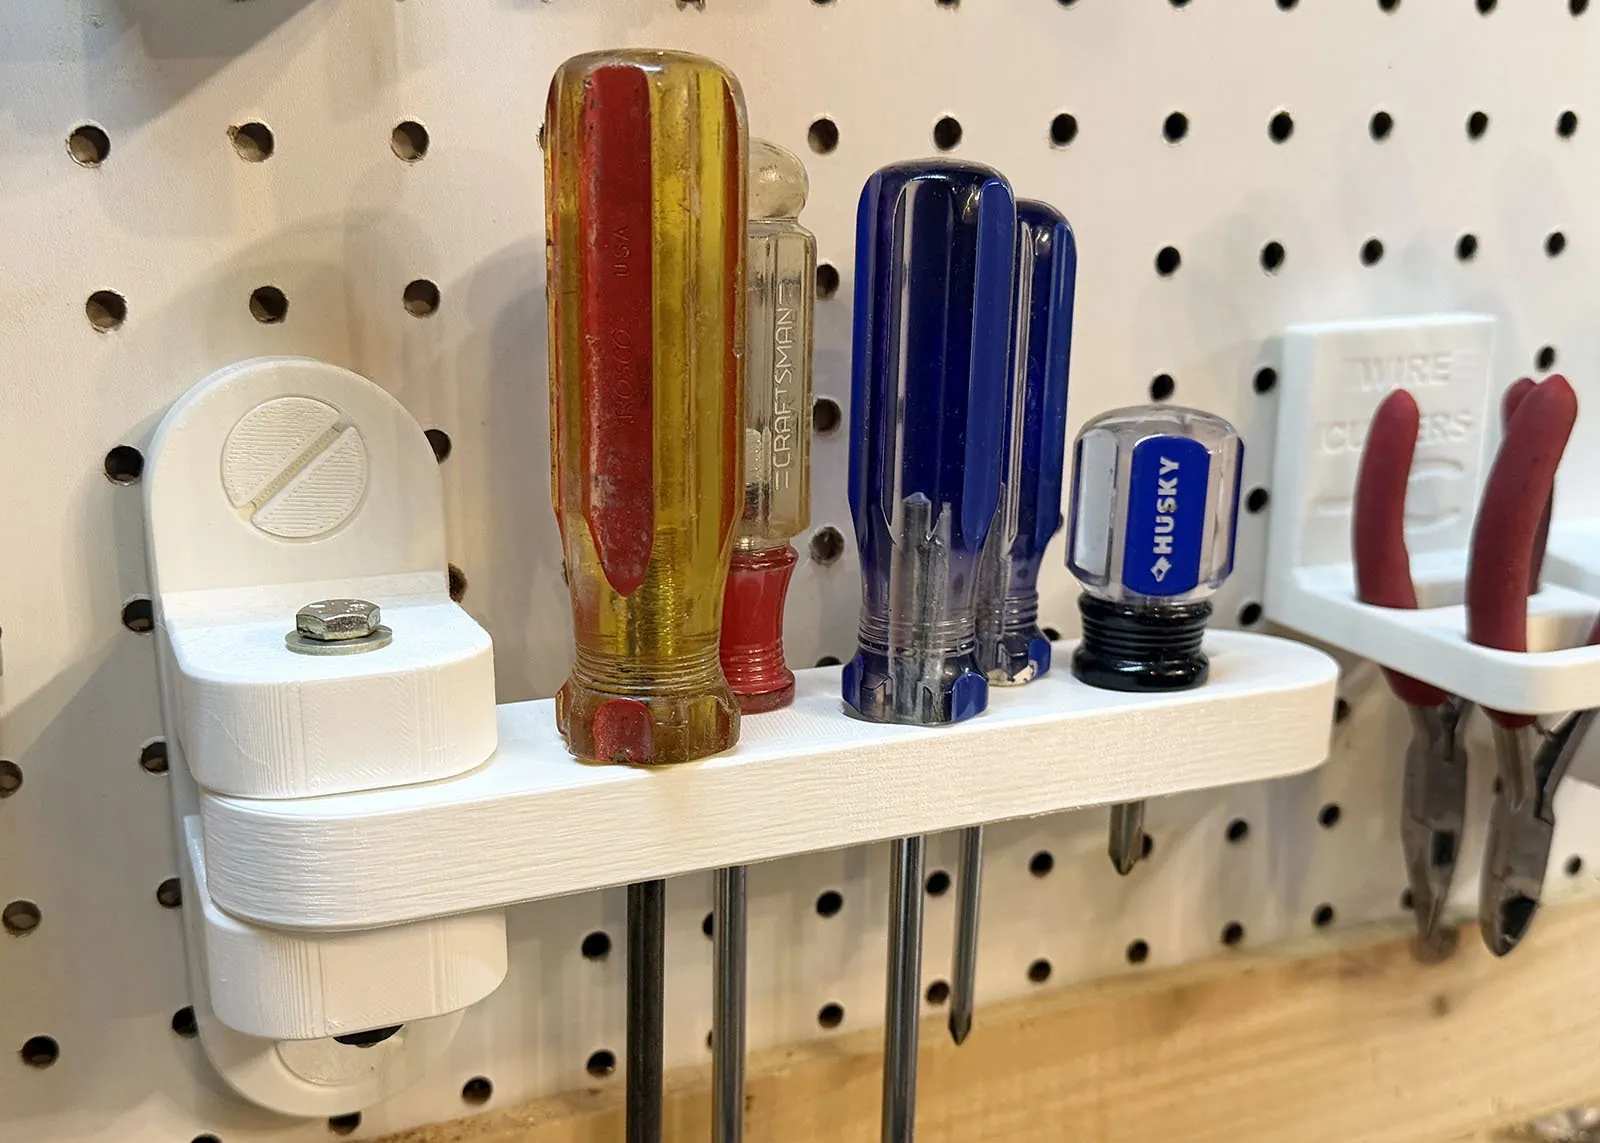
Folded, it sticks out only 2-5/8" (67 mm) from the board, and the board above it is free for other tools.
Counterbores keep the drivers upright
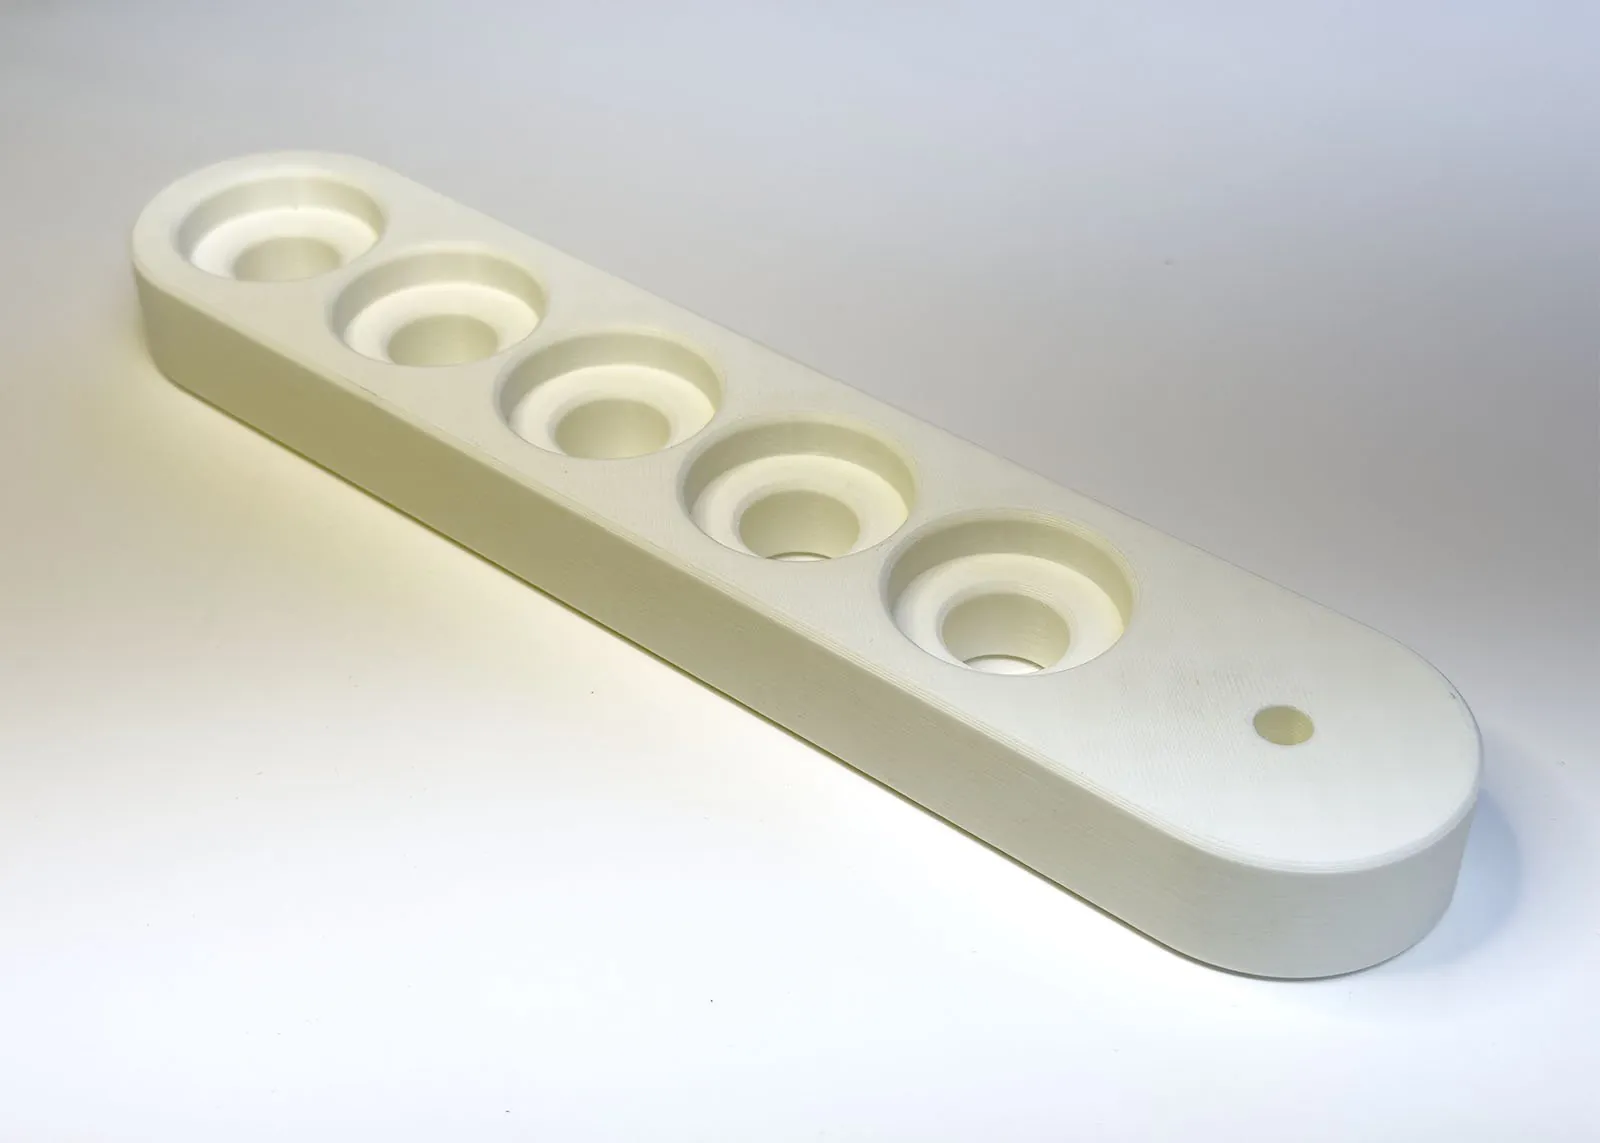
The arm has 5 holes in a row for the shafts, 5/8" (15.9 mm) across. Each hole has a counterbore on top, 1.144" (29.1 mm) across and 1/4" (6.4 mm) deep. The end of the handle sits down in it, so the screwdriver stands straight instead of leaning or tipping over. The counterbores fit handle ends up to about 1-1/8" (29 mm).
How it goes together
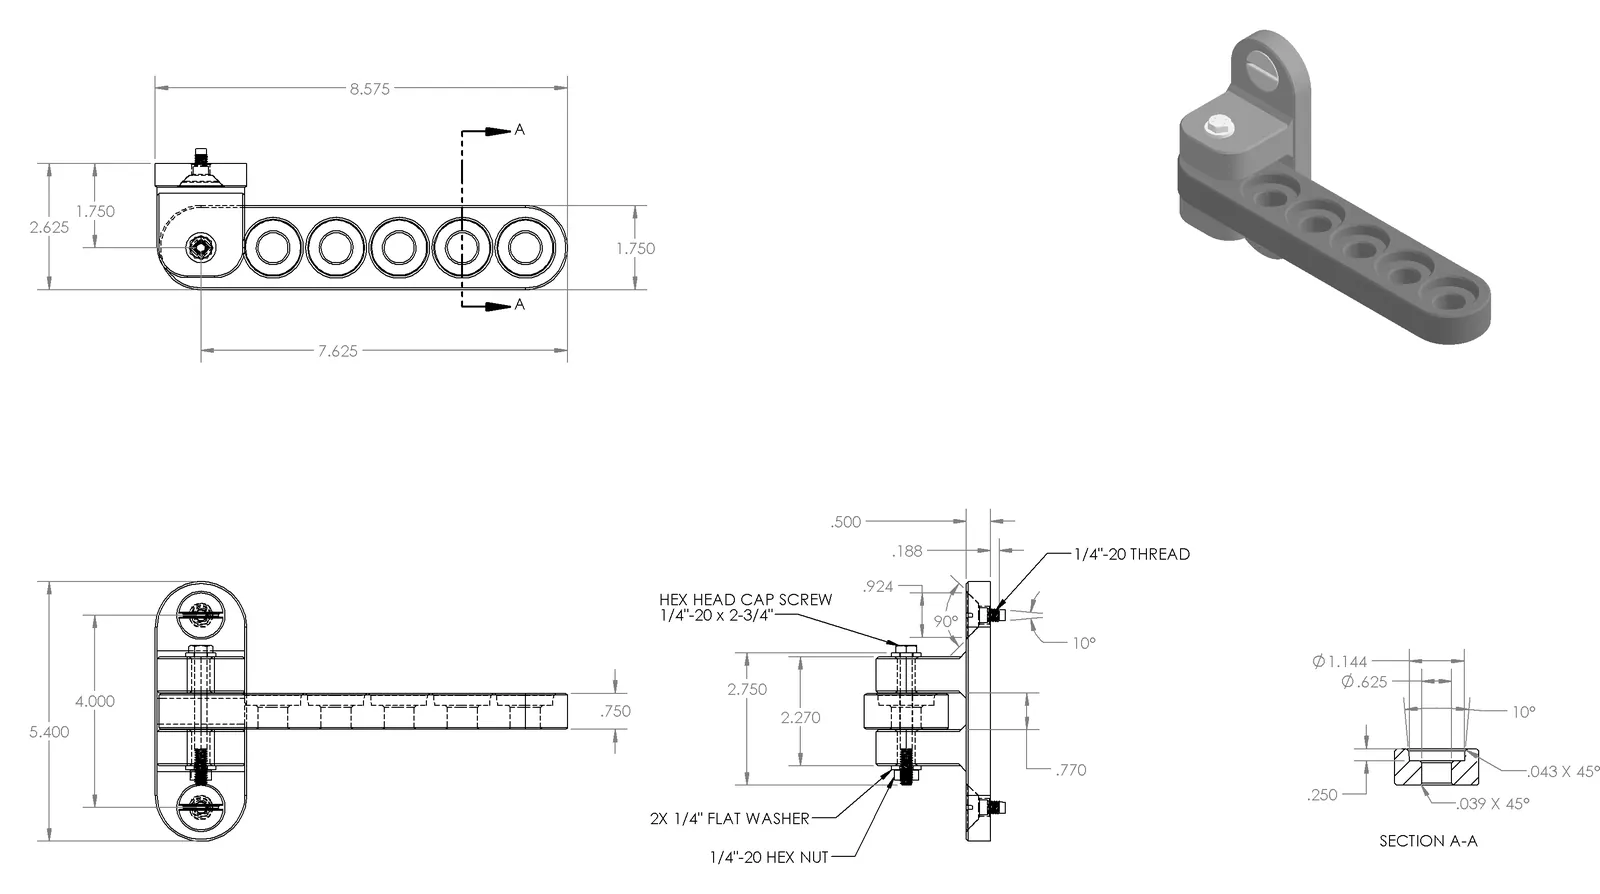
- Hinge mount. A plate that screws to the pegboard, with two knuckles that hold the arm.
- Arm. It fits between the knuckles. It's 3/4" (19 mm) thick in a 0.770" (19.6 mm) gap, so it swings freely.
- Hinge pin. A 1/4-20 x 2-3/4" hex head bolt runs through the knuckles and the arm, with a flat washer at each end and a hex nut.
- Two printed screws. They hold the mount to the board. No hooks are needed.
The arm is 7-5/8" (194 mm) from the hinge pin to the tip, 1-3/4" (44 mm) wide. Swung out, the tip reaches about 9-3/8" (238 mm) from the board. It fits standard pegboard with 1/4" holes on 1" spacing, and I tested it on 3/16" thick board. It is not for IKEA Skådis or other slotted boards.
The printed screws
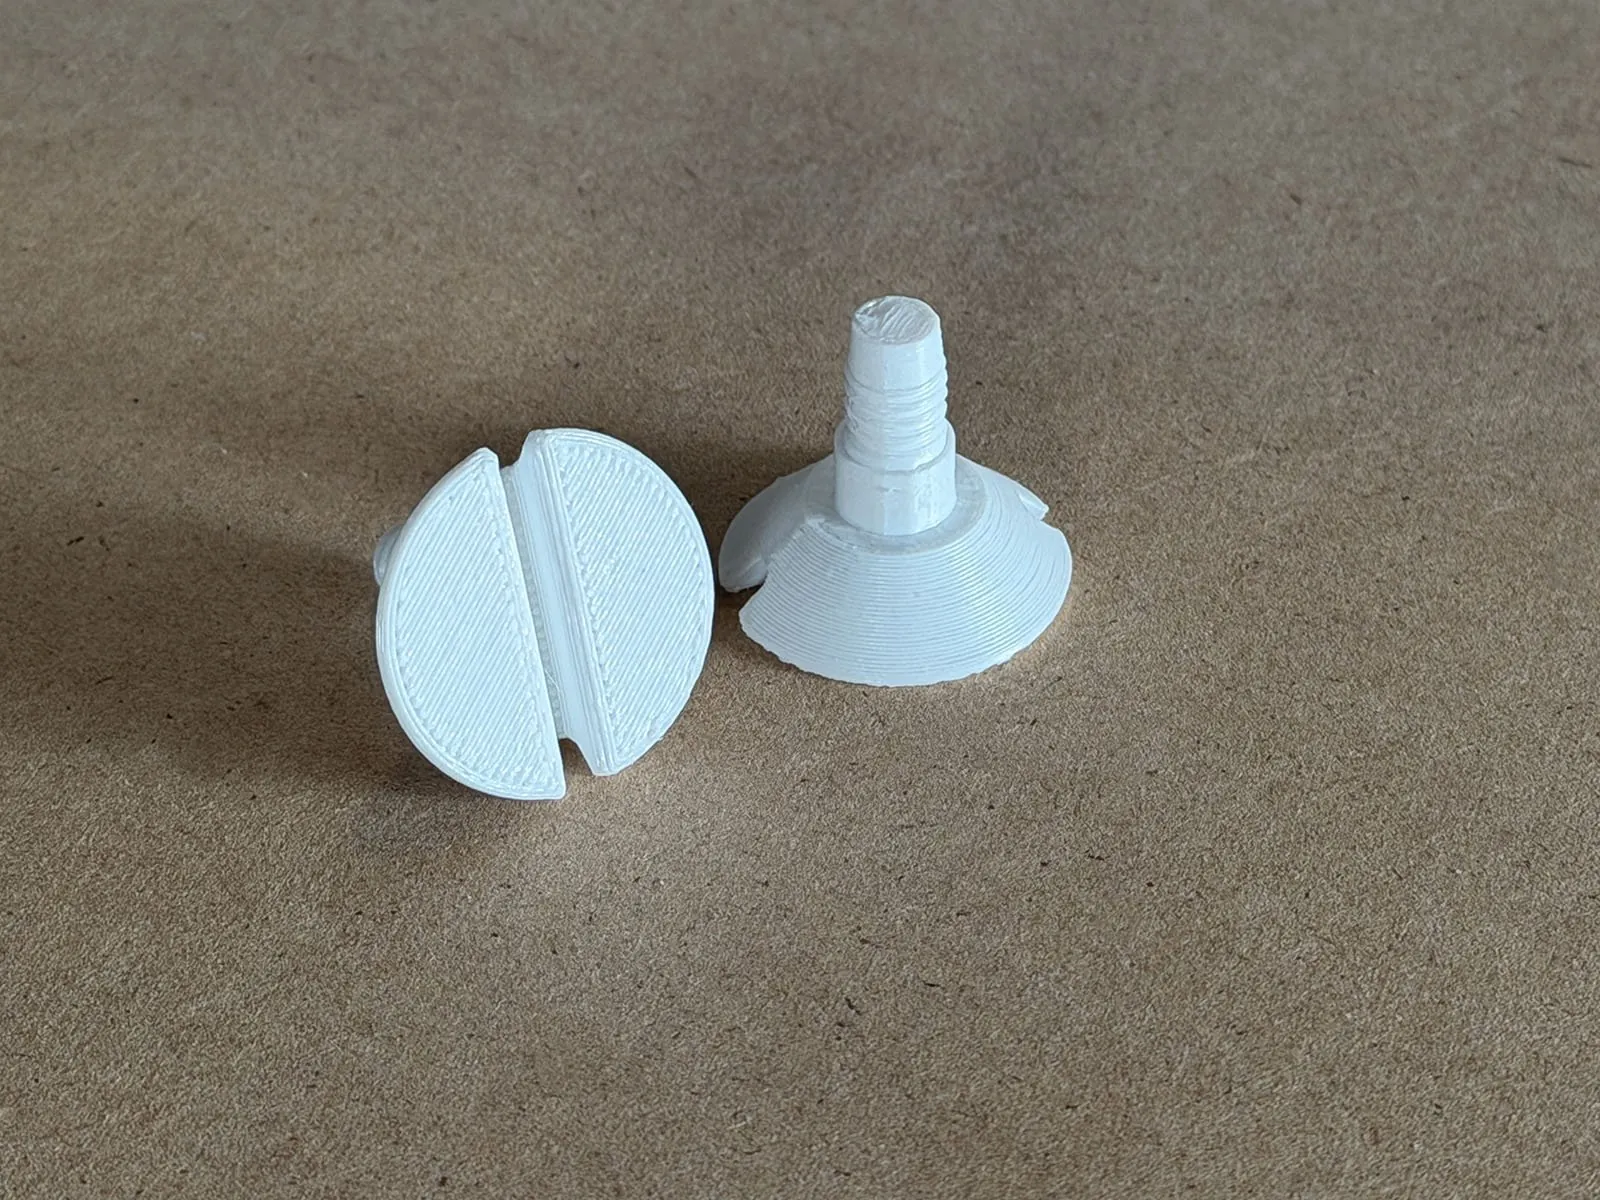
These are the same screws I use on my screw-in pegboard holder for a driver set and my magnetic tool holder bar. They keep the mount from wobbling or lifting off when you grab a driver.
- They grip the hole. The 1/4-20 thread is made oversize, 0.265" (6.7 mm) across in a 1/4" pegboard hole, so it bites into the edge of the hole.
- They center themselves. A tapered tip drops into the hole and lines the screw up as you start it.
- They take a flat-head screwdriver. The head has a slot for an ordinary screwdriver.
- They sit flush. The countersunk head sits down in a 90° countersink in the mount, just below the surface.
Printing it
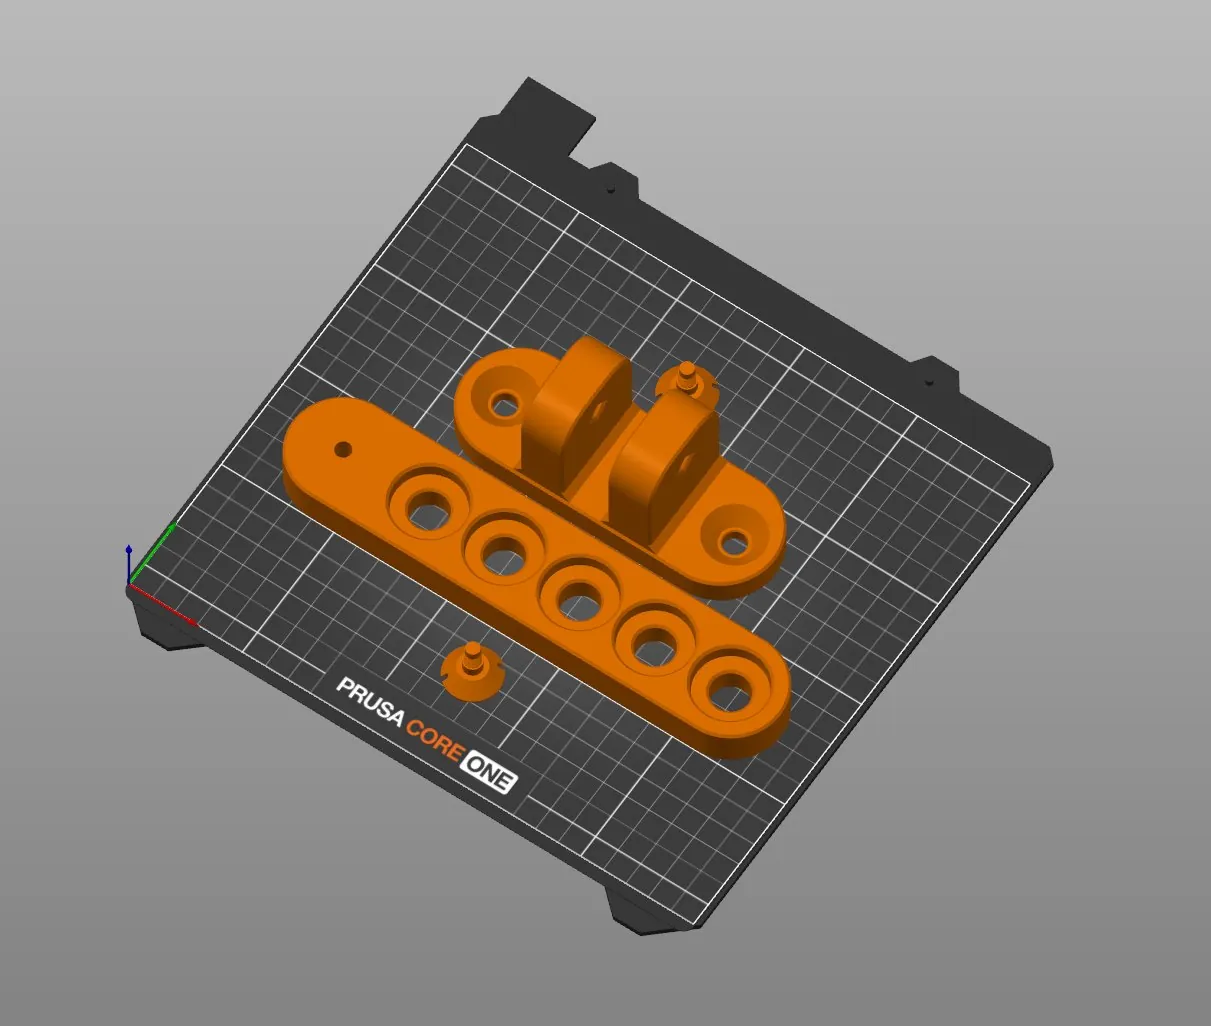
All the parts print together on one plate with no supports and no brim. The arm lies flat with the counterbores up, the hinge mount lies on its back with the knuckles standing up, and the screws stand on their heads. The pin holes in the knuckles are diamond-shaped so they print standing up without supports.
I printed mine in PETG on a Prusa CORE One with the stock 0.25mm STRUCTURAL profile in PrusaSlicer 2.9.6. The plate takes about 119 g of filament and 3 hours 35 minutes. The Printables page has the full settings.
What else you'll need
- 1 x 1/4-20 x 2-3/4" hex head cap screw for the hinge pin (McMaster-Carr 91257A553)
- 1 x 1/4-20 hex nut
- 2 x 1/4" flat washers, one under the bolt head and one under the nut
- A flat-head screwdriver to drive the printed screws
Putting it up
- Put a washer on the bolt. Set the arm between the knuckles and push the bolt down through the top knuckle, the arm and the bottom knuckle.
- Add the second washer and the nut. Tighten it until the arm swings with a little drag. If it's too loose, the arm will flop.
- Hold the hinge mount against the pegboard and line up its two holes with pegboard holes four apart, one above the other.
- Start each printed screw in its hole. The tapered tip centers it.
- Turn the screws in with a flat-head screwdriver until the mount is snug against the board. Stop there, because plastic threads strip if you overtighten them.
- Drop your screwdrivers into the arm. The handles settle into the counterbores.
To move the arm, unscrew it and screw it in somewhere else.
I drew it in SolidWorks. If you want a different hole size, a bigger counterbore or more holes, the STEP files are on Printables.
Get the files
Swing-Out Screwdriver Arm for 1/4" Pegboard on Printables. It is free under a Creative Commons Attribution-NonCommercial license. If you print one, please post a Make there and show what drivers you put in it.