A Magnetic Tool Holder Bar for 1/4" Pegboard
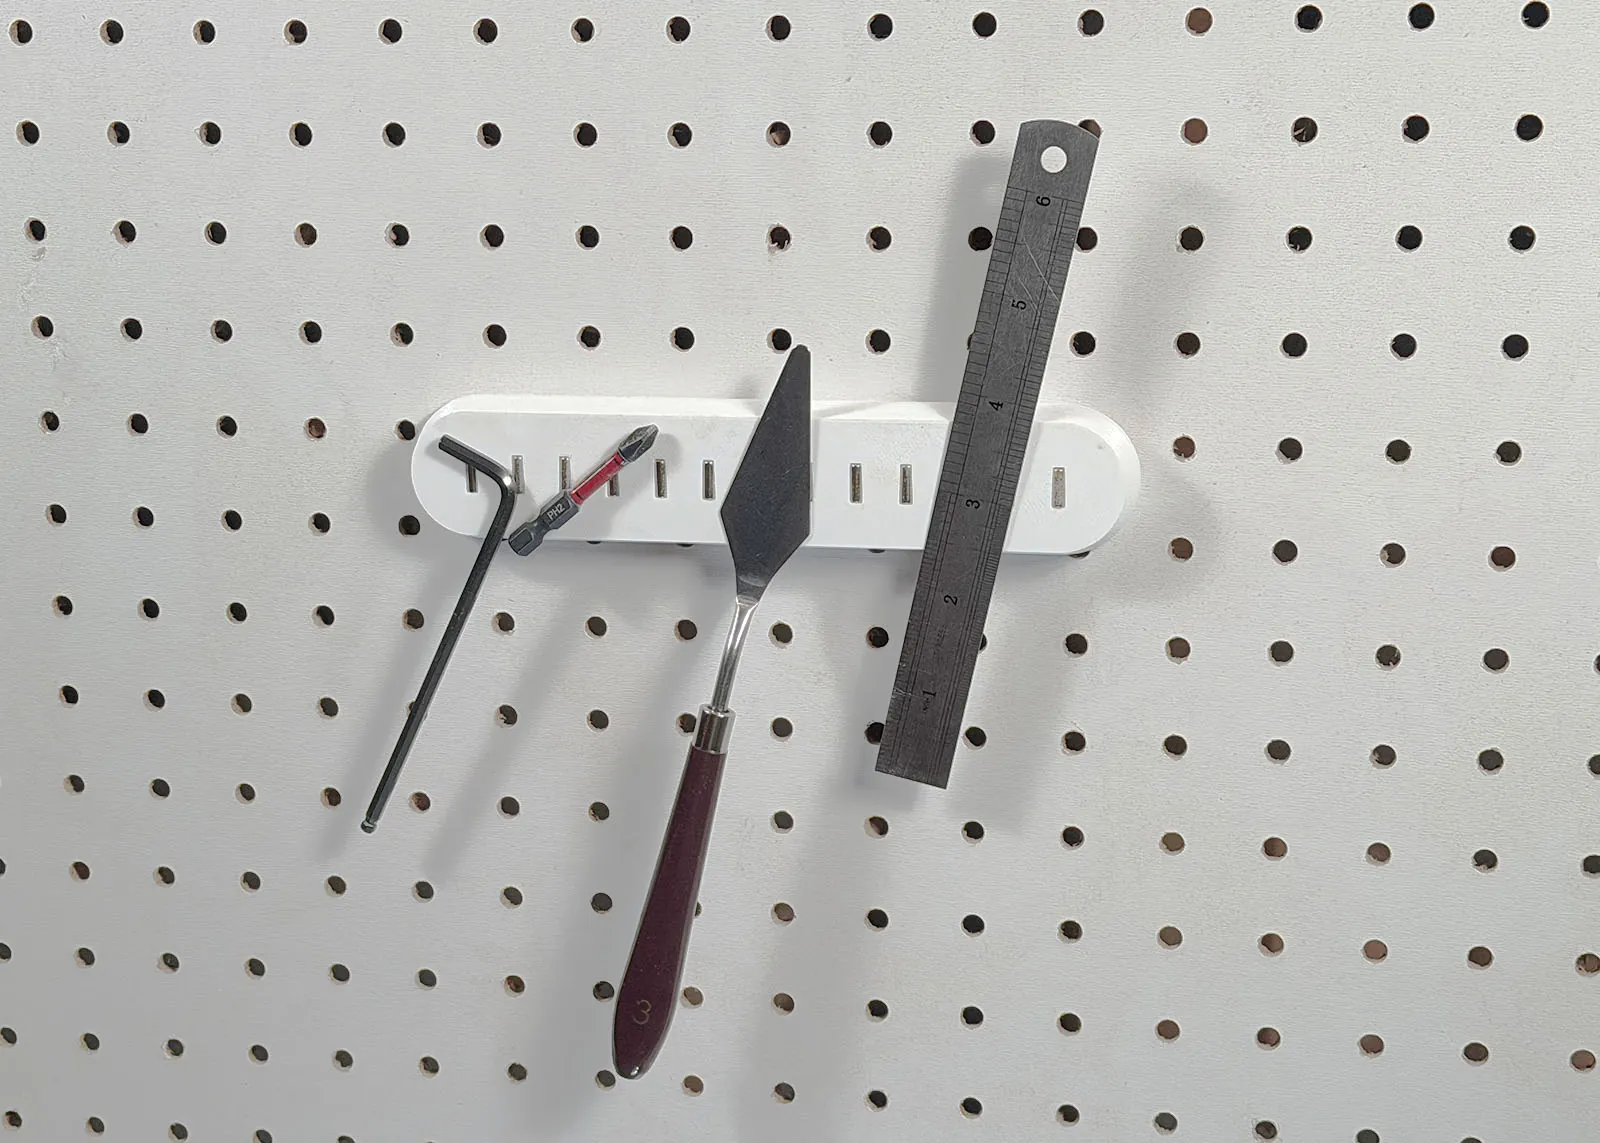
The small steel tools are the ones I lose on the bench: hex keys, driver bits, a short ruler. This bar keeps them on the pegboard where I can see them. It has 13 magnets across the front. Pull a tool off with one hand, and when you're done, put it back against the bar. There's no hook to aim for and no slot to fit it into.
Download the bar and screws free on Printables
The files are on Printables: STEP files for the bar and the screw, and the SolidWorks part file for the bar. I've also entered it in the Printables Designer Challenge: Pegboard Wall Organizers.
Magnets that press in, no glue
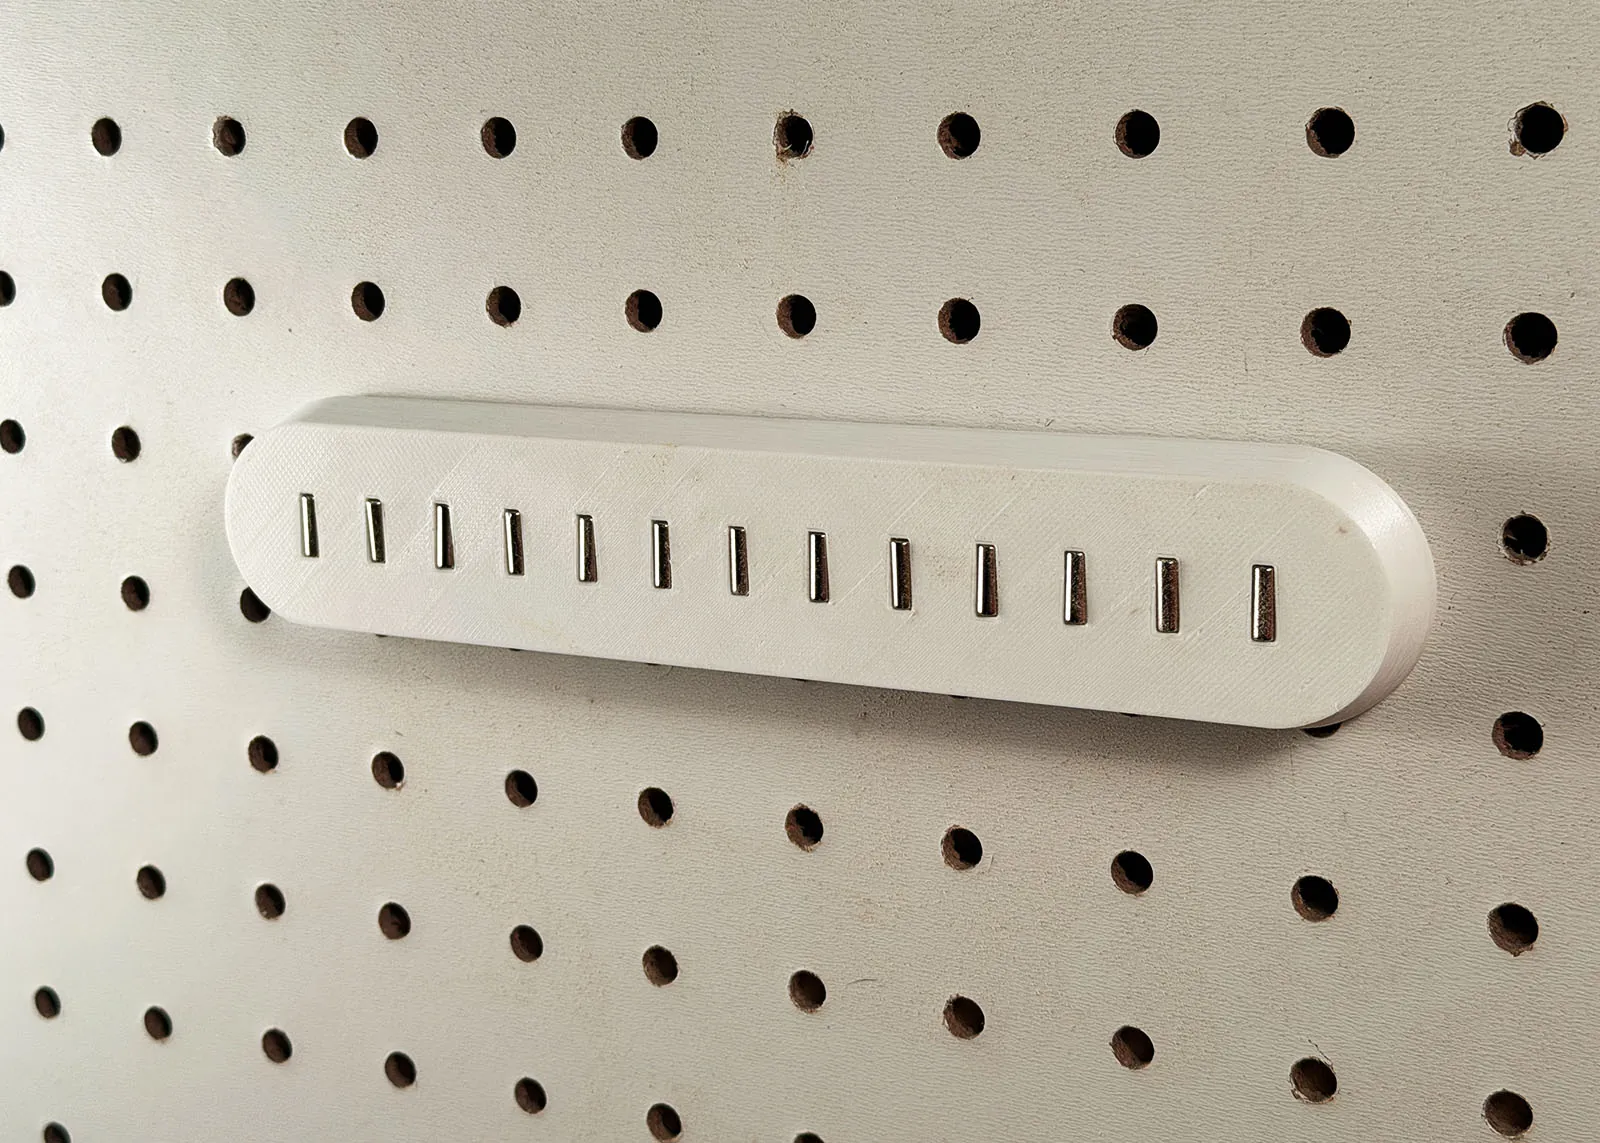
The magnets are 1/8" across and 3/8" long (3.2 x 9.5 mm). Each one lies on its side in a slot and you press it in with your thumb. You don't need glue, a tool or a pause in the print to drop them in. The front of each magnet is left bare, so a tool touches the magnet, not plastic.
I got the idea of pushing cylindrical magnets into slots from Slant 3D's video Stop Gluing Magnets Into Your 3D Prints.
The slots are sized for imperial 1/8" magnets, so order that size and not a metric one. I used AplysiaTech N52 1/8" x 3/8" magnets. A pack of 100 is enough for 7 bars.
What it holds
It works best with light steel tools that have a flat side to sit against the magnets. On my board it holds a hex key, a 1/4" hex driver bit, a palette knife and a 6" steel ruler. The magnets are small, so the bar isn't meant for heavy tools.
How it hangs
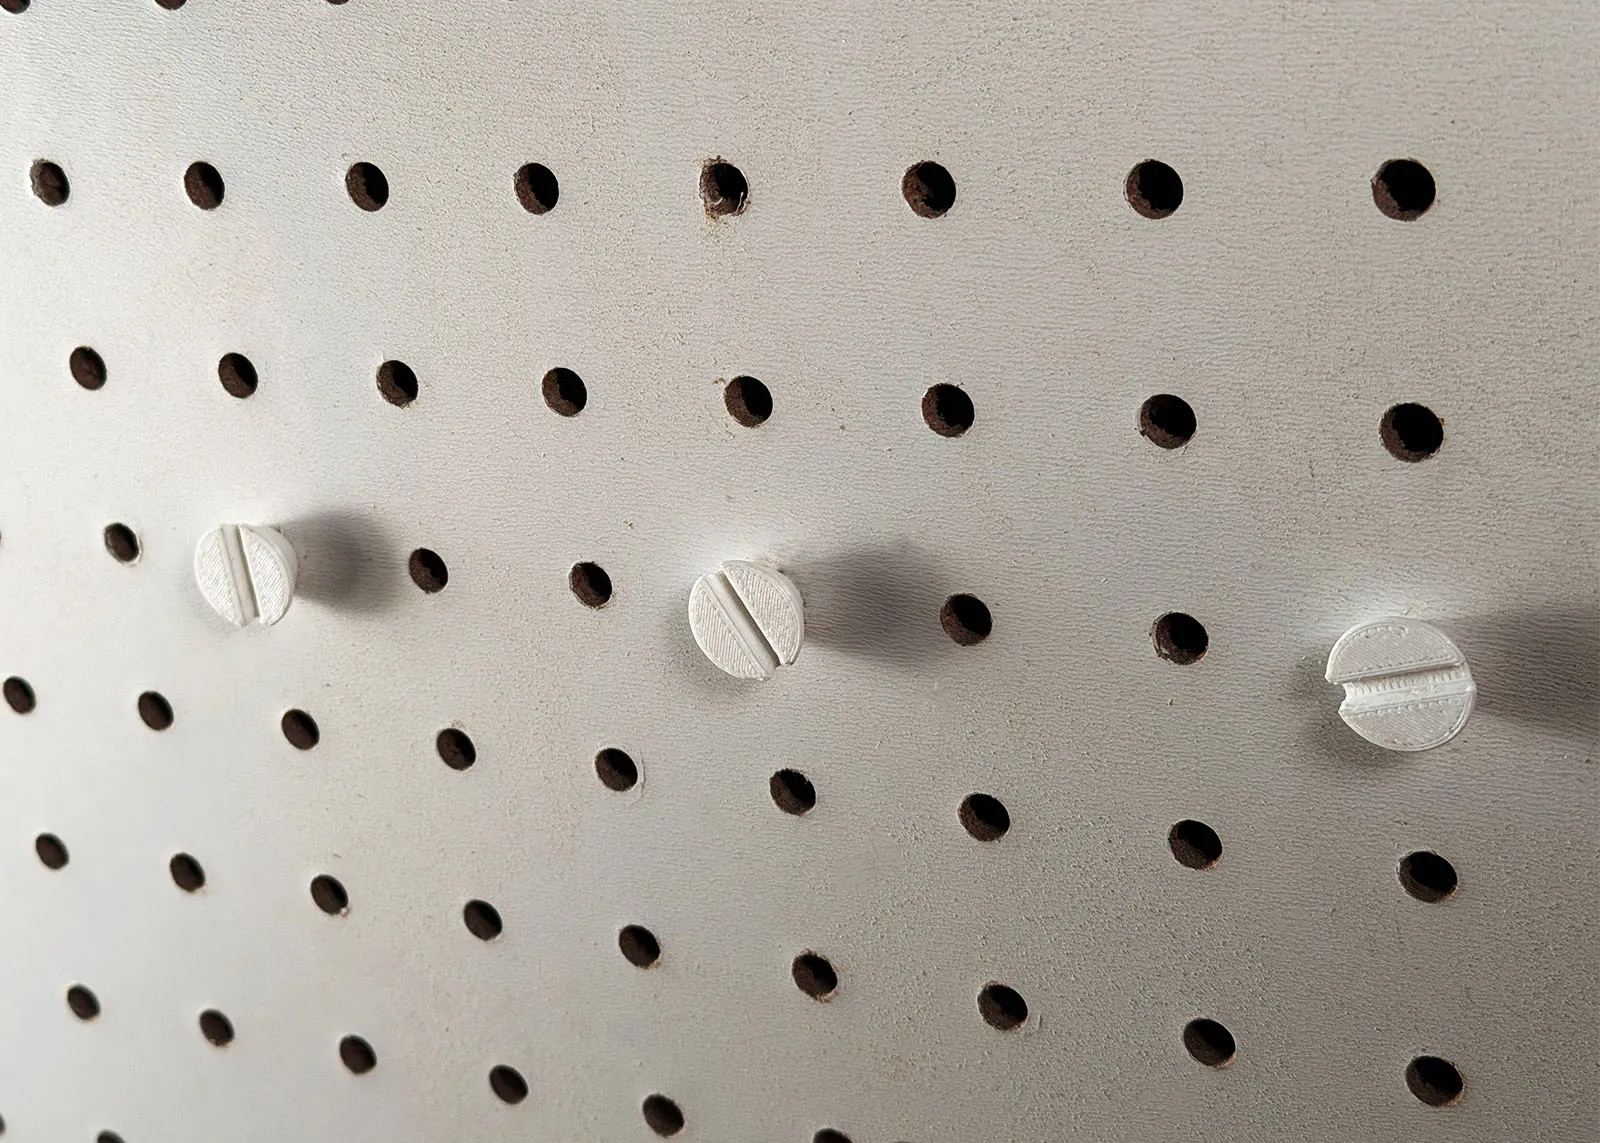
The bar hangs on three 3D printed screws. They're the same screws I use on my screw-in pegboard holder for a driver set, now on version 5. On that holder the screws go through the holder into the board. Here they go into the board first and the heads stay out for the bar to hang on.
- They grip the hole. The 1/4-20 thread is slightly oversize, so it bites into the edge of the pegboard hole.
- They center themselves. A tapered tip drops into the hole and lines the screw up as you start it.
- They take a flat-head screwdriver. The head has a slot for an ordinary screwdriver.
- They lock the bar on. The underside of the head is a cone. It fits a tapered pocket in each of the three keyhole slots on the back of the bar, so the bar stays on the board when you pull a tool off.
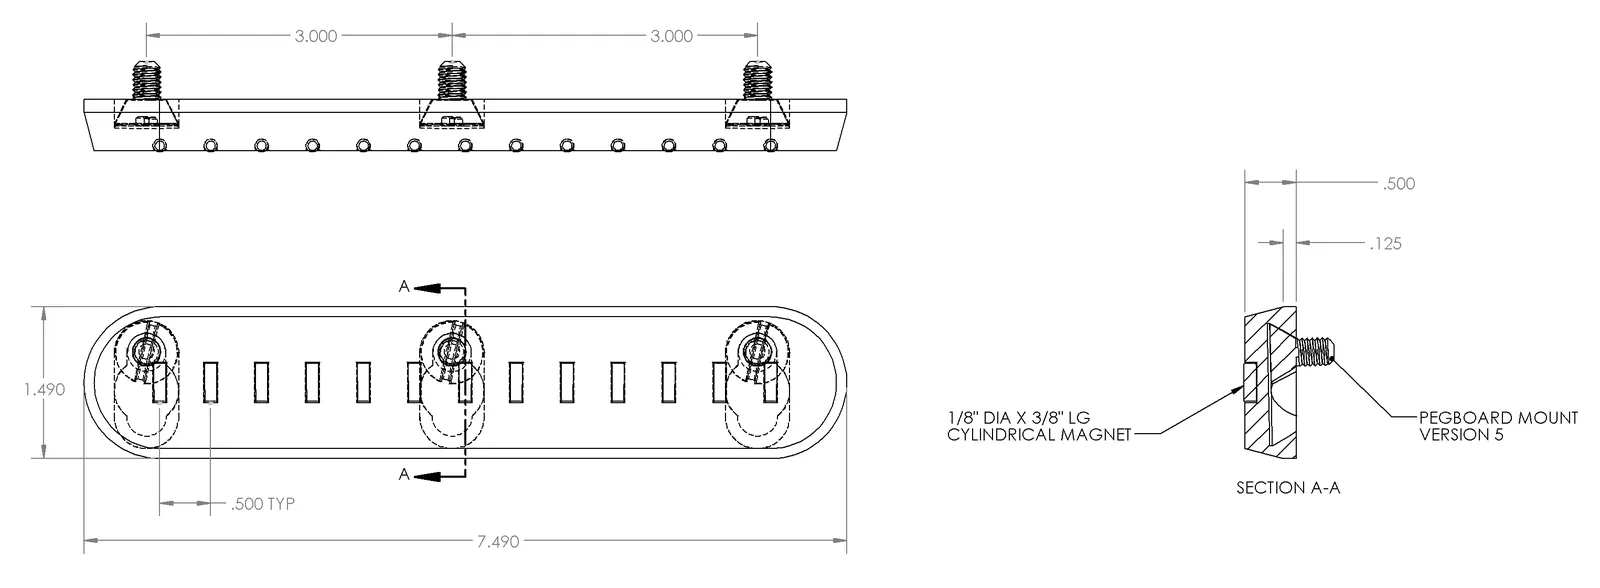
The bar is 7.49 x 1.49 x 0.50 in. (190 x 38 x 12.7 mm), with the magnets 1/2" apart and the screws 3" apart. It sticks out 1/2" from the board. It fits standard pegboard with 1/4" holes on 1" spacing, and I tested it on 3/16" thick board. It is not for IKEA Skådis or other slotted boards.
Printing it
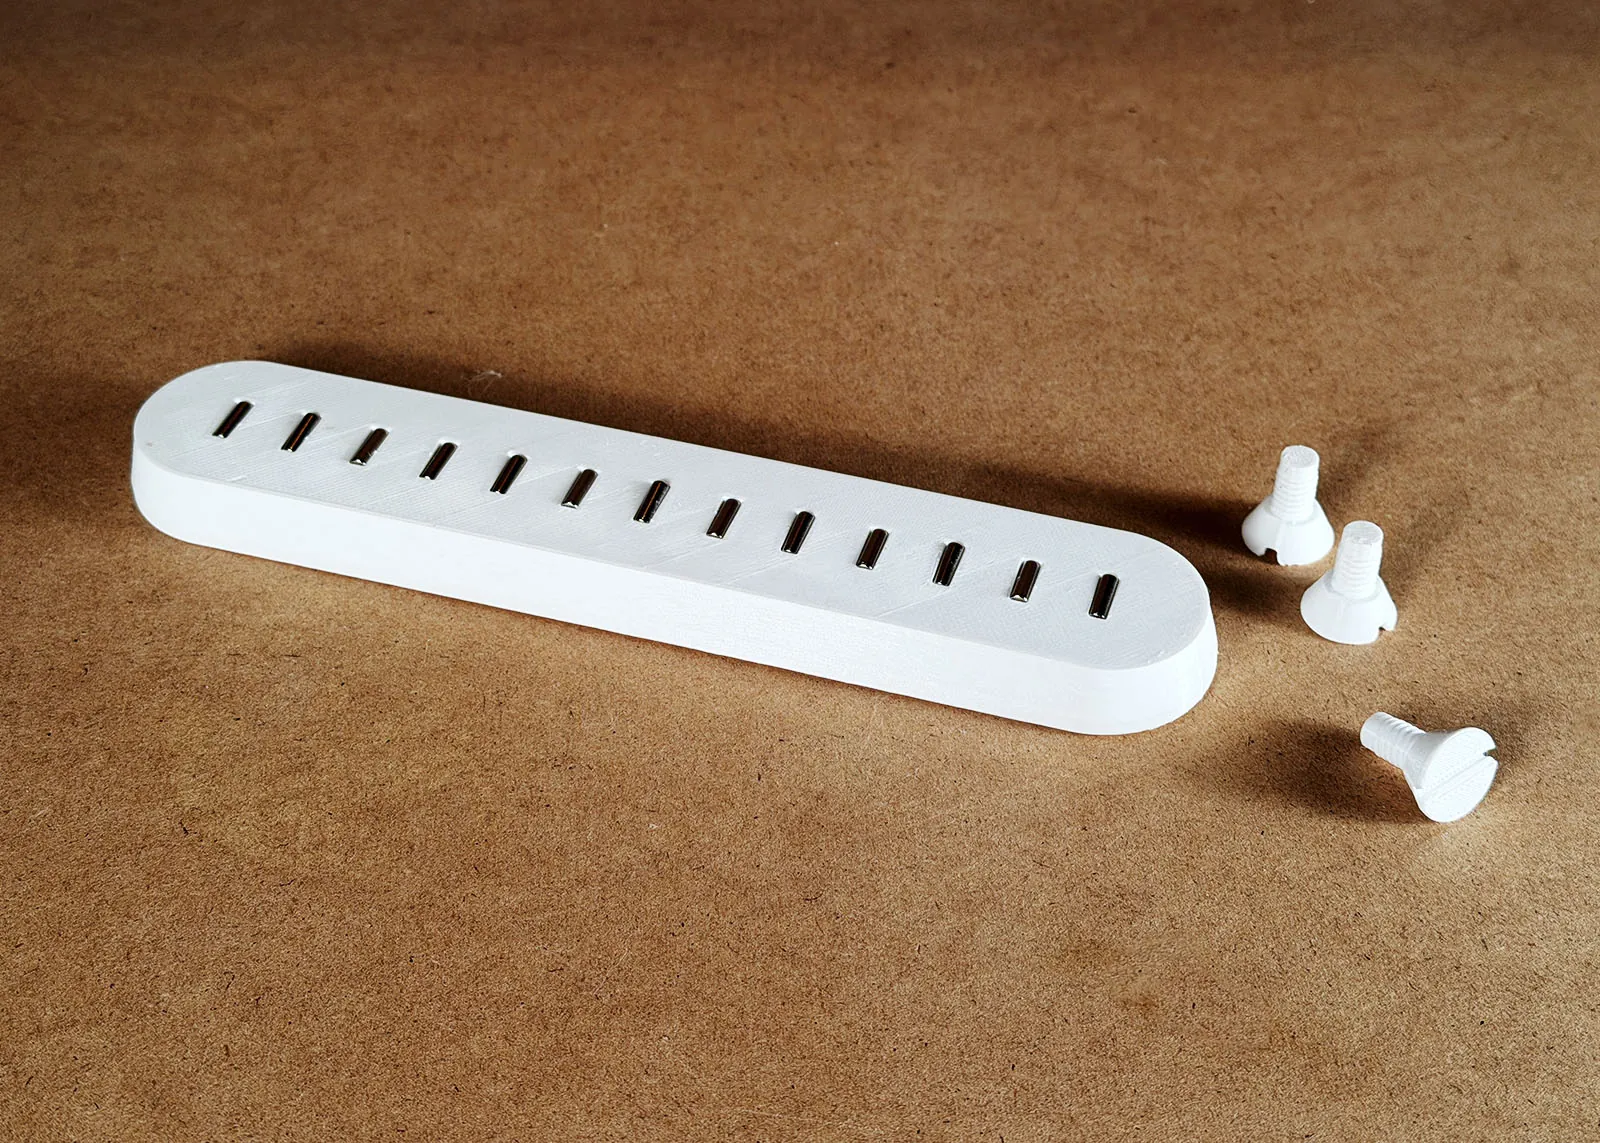
The bar and the three screws print together on one plate with no supports and no brim. The bar lies on its back with the magnet slots facing up, and the screws stand on their heads. I printed mine in PETG on an Original Prusa i3 MK3S with the stock 0.20mm QUALITY profile in PrusaSlicer 2.9.6. The Printables page has the full settings and my config file.
Putting it up
- Press a magnet into each slot with your thumb.
- Pick three pegboard holes in a row, three holes apart.
- Start a printed screw in each hole. The tapered tip centers it.
- Turn each screw in with a flat-head screwdriver until the underside of the head touches the board. Stop there, because plastic threads strip if you overtighten them.
- Line up the round ends of the keyholes with the screw heads. Push the bar flat against the board, then slide it down until it stops.
- Stick your tools on.
To take the bar down, slide it up and pull it off the screws.
I drew it in SolidWorks. If you want a longer bar or a different magnet size, the STEP file and the SolidWorks part are on Printables.
Get the files
Magnetic Tool Holder Bar for 1/4" Pegboard on Printables. It is free under a Creative Commons Attribution-NonCommercial license. If you print one, please post a Make there and show what tools you stuck on it.