A Magnetic Chisel Holder for 1/4" Pegboard
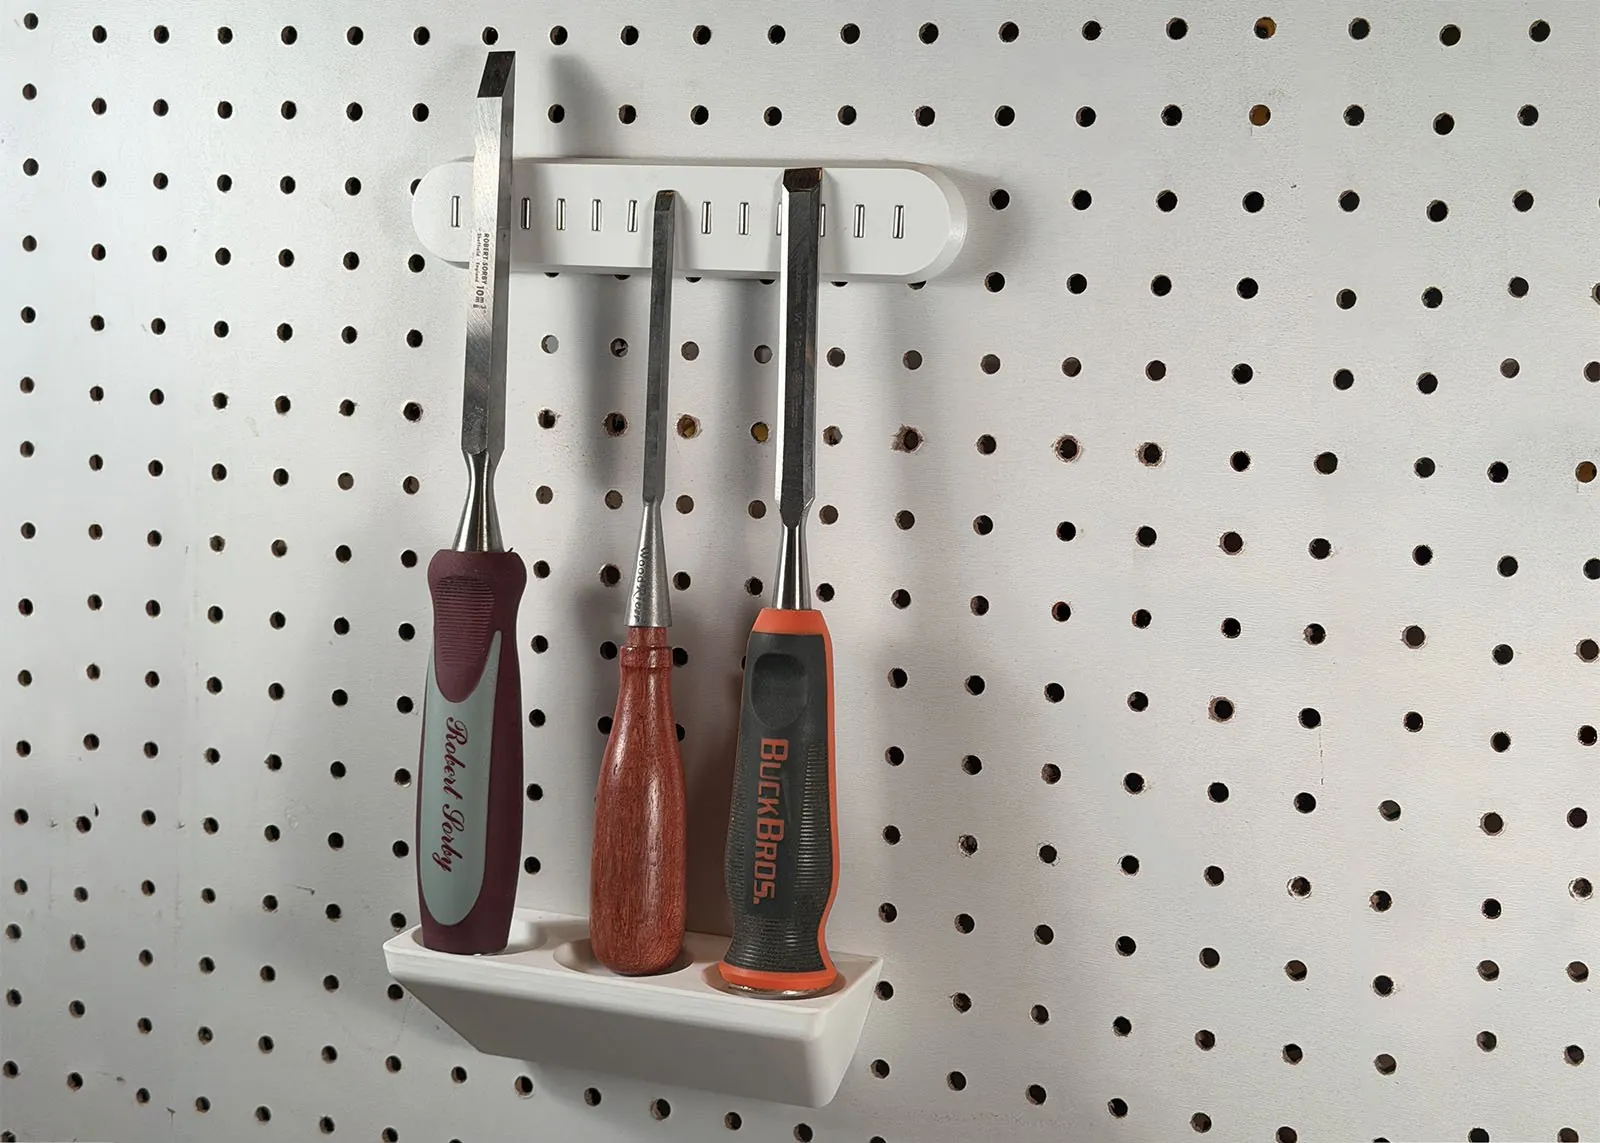
Most chisel holders have a slot for each blade, sized for one set: Narex, Stanley, Irwin or Craftsman. If your chisels came from different sets, or you bought them one at a time, they don't fit. The three on my board are three different makes, and each one is a different width.
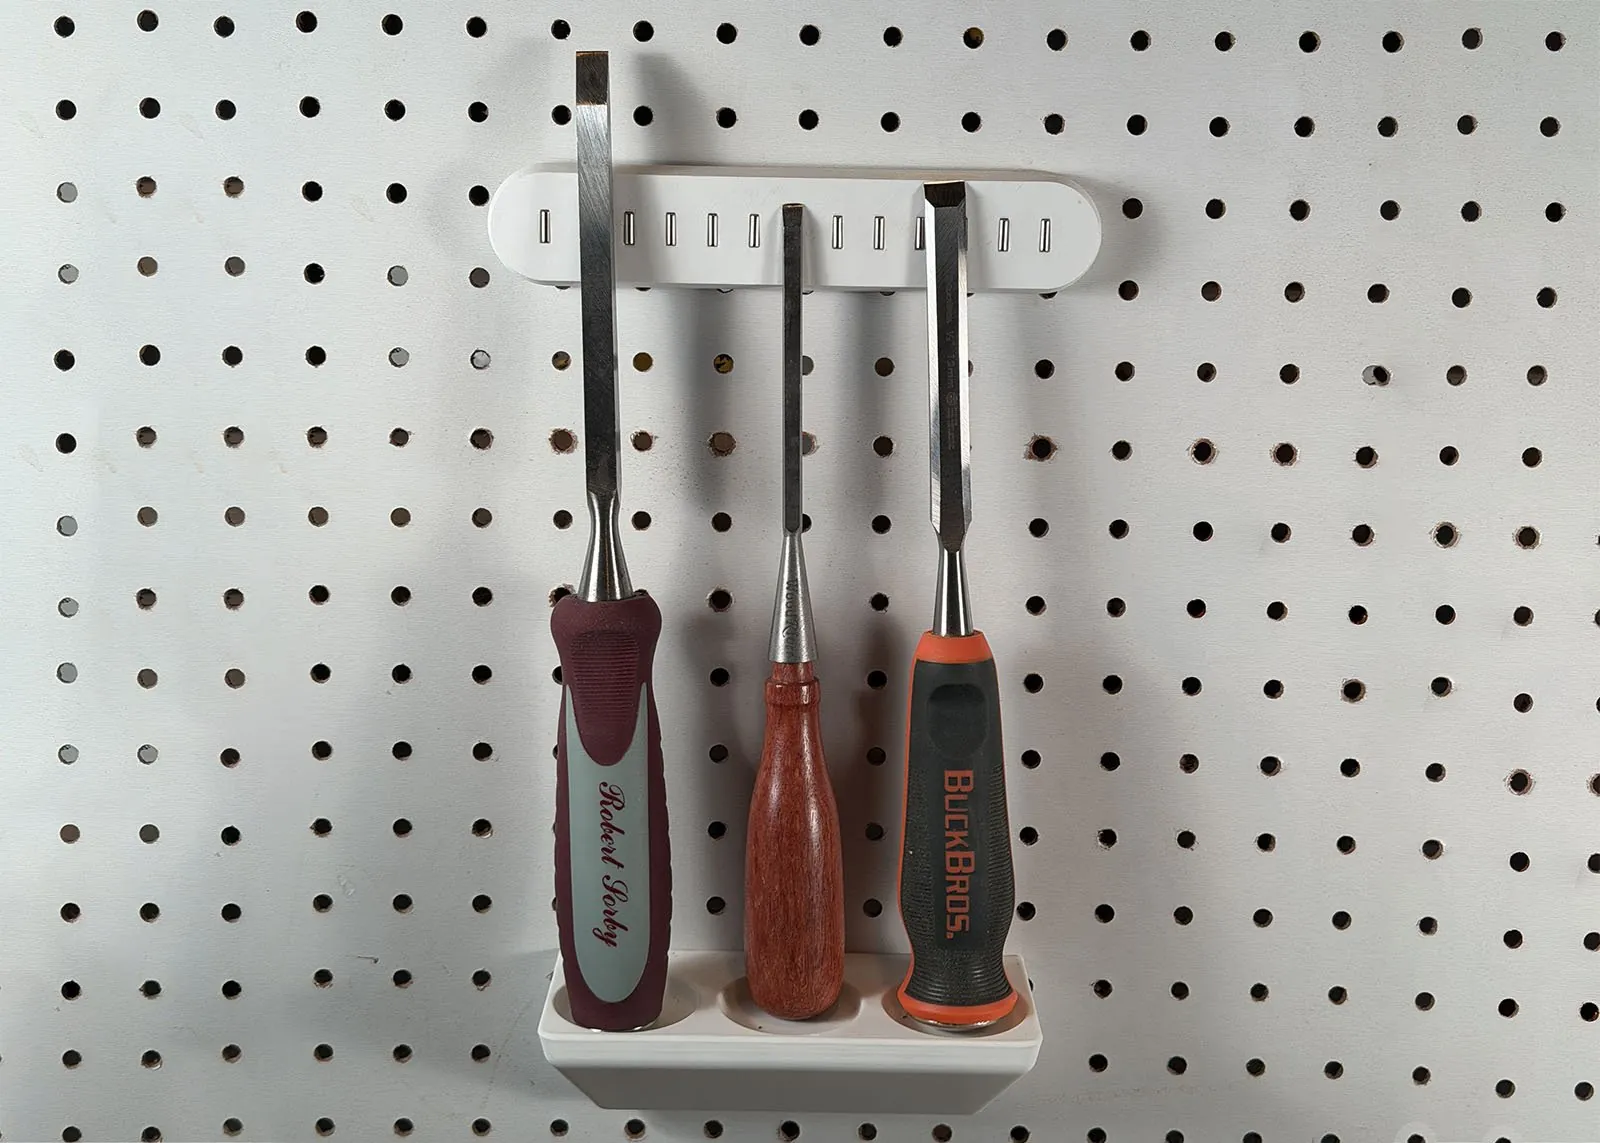
This holder doesn't touch the blade. The end of each handle sits in a countersink in a small rack, and the steel leans back against my magnetic tool holder bar, which hangs higher up on the same board. Any blade width fits, and you hang the bar at whatever height suits your chisels.
Download the chisel rack free on Printables
The files are on Printables: the STEP file and the SolidWorks part file for the rack, and a 3MF with my print settings. The rack works together with the magnet bar, and the bar's Printables page has the files for the bar and the printed screw.
No slots, so any chisel fits
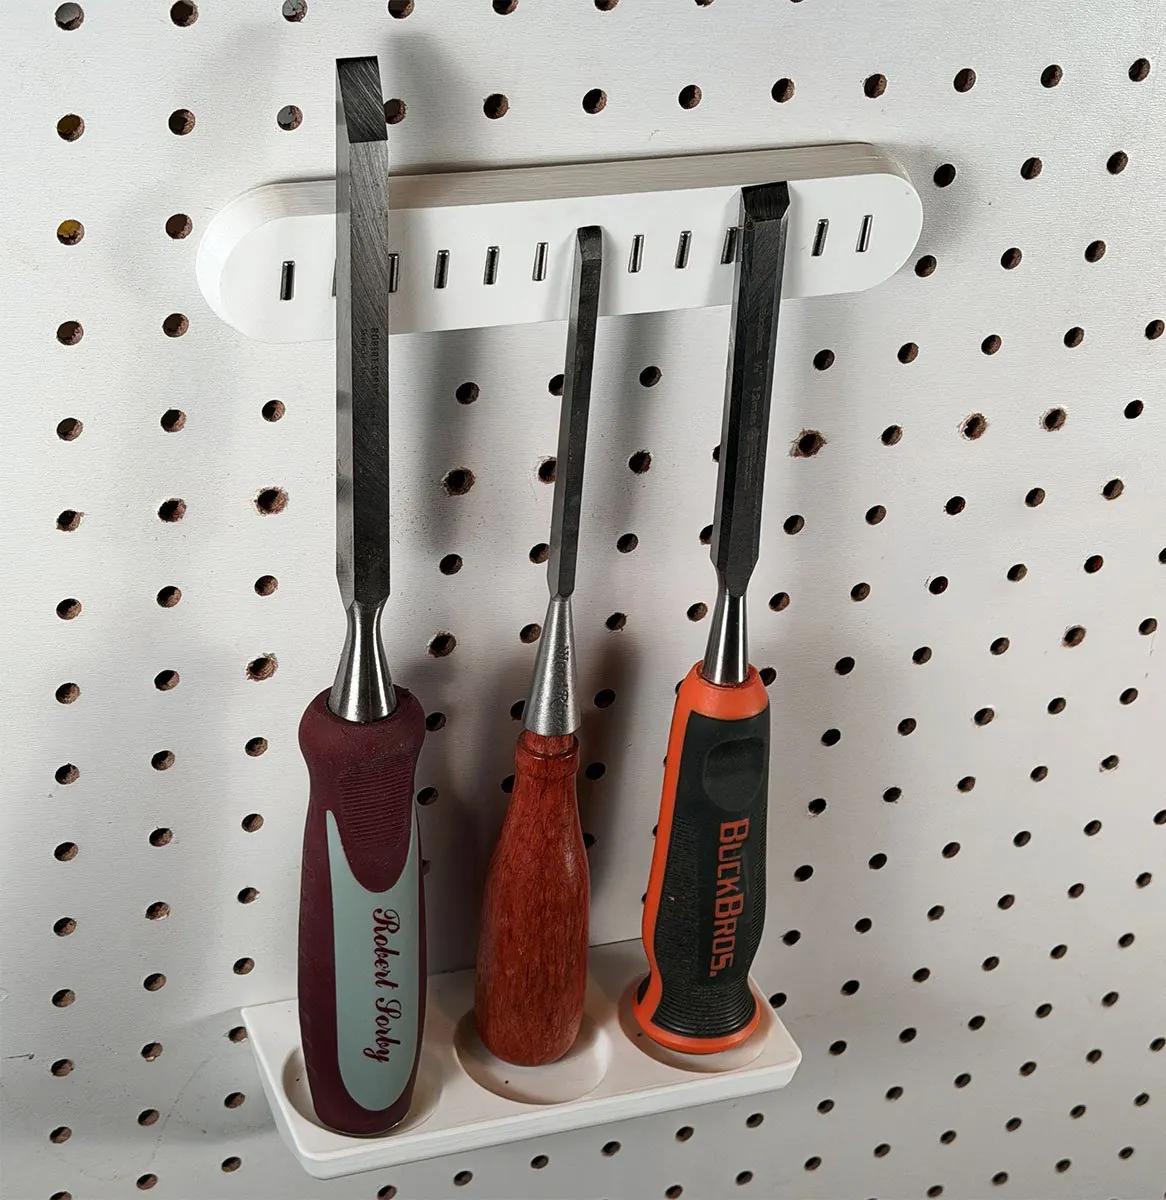
- Countersinks hold the handles. Three countersinks run across the top of the rack. The end of a handle drops in and can't slide off the front.
- Magnets hold the top. The steel leans back against the magnets on the bar above, so the chisel can't tip forward.
- You take one out with one hand. Tip the chisel forward off the magnets and lift it out of its countersink. To put it back, drop the handle in and lean the steel back onto the bar.
What it holds
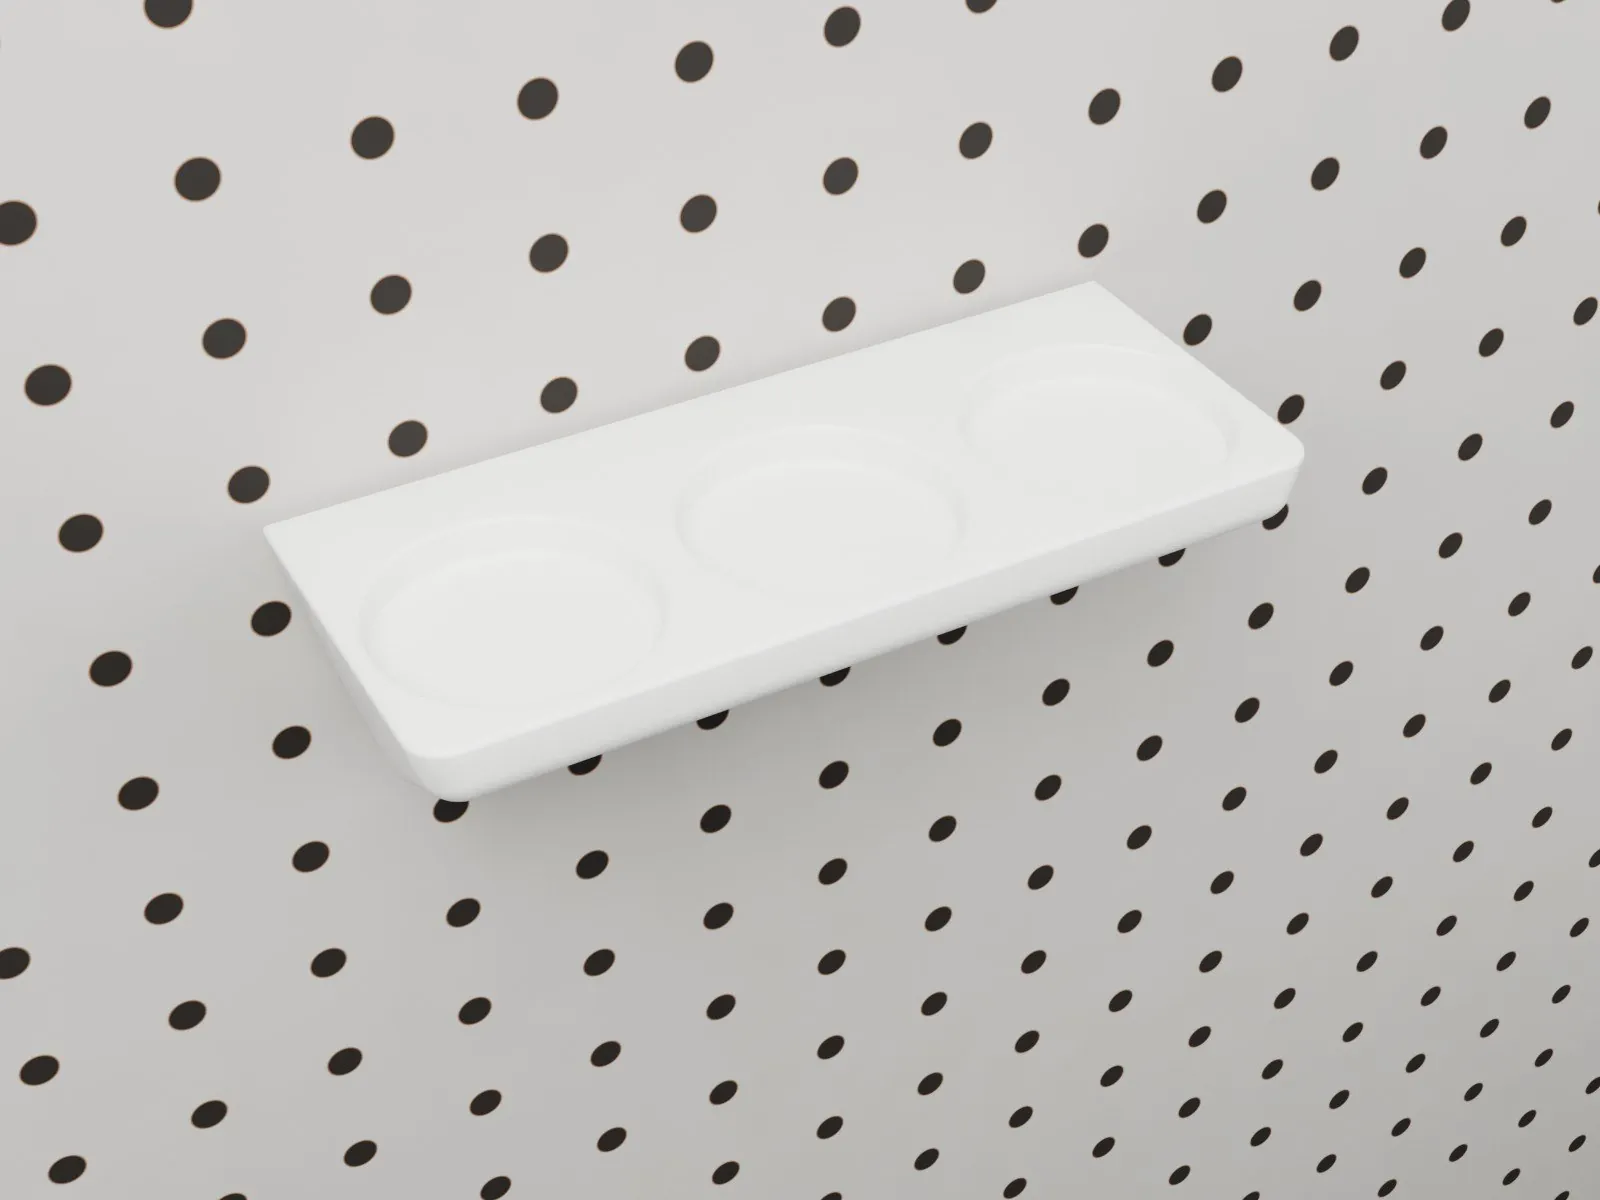
It holds three chisels with handle ends up to 1-3/4" (44.5 mm) across. The countersinks are 1/4" (6.4 mm) deep on 2" (50.8 mm) centers, and the flat bottom of each one is 1-9/16" (39.7 mm) across, so most handles sit flat on it.
Nothing touches the blade except the magnets, so the blade can be any width. The chisels can be any length too: hang the magnet bar higher for long ones and lower for short ones.
How it hangs
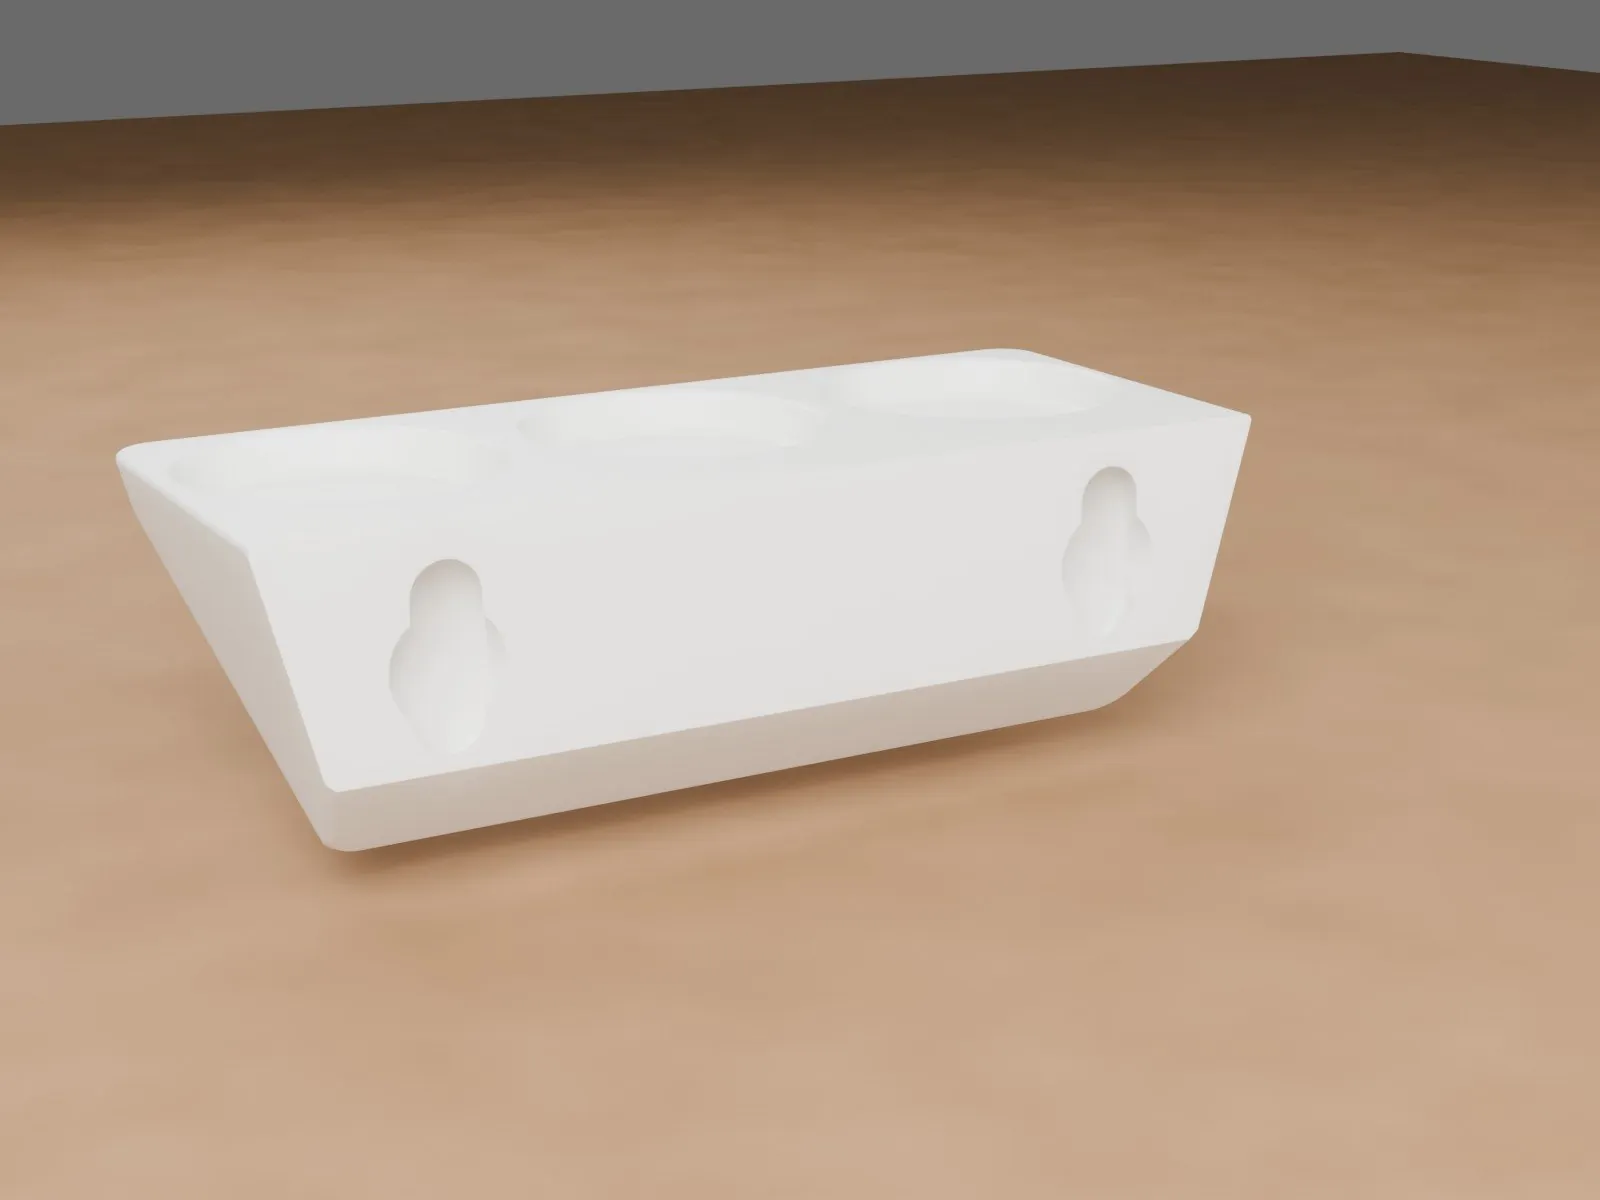
The rack hangs on two 3D printed screws. They're the same screws I use on my magnetic tool holder bar and my epoxy & glue bottle holder: the screws go into the board first and the heads stay out. The rack hangs on them.
- They grip the hole. The 1/4-20 thread is slightly oversize, so it bites into the edge of the pegboard hole.
- They center themselves. A tapered tip drops into the hole and lines the screw up as you start it.
- They take a flat-head screwdriver. The head has a slot for an ordinary screwdriver.
- They lock the rack on. The underside of the head is a cone. The two keyhole slots on the back of the rack, 4" (101.6 mm) apart, have tapered lips that fit that cone, so the rack can't pull away from the board.
The rack is 6.00" wide, 2.44" deep and 1.86" tall (152.4 x 61.9 x 47.2 mm), so it sticks out 2.44" from the board. The centers of the countersinks are 1.44" (36.5 mm) out from the board. The rack's two screws go in one row, 4" apart, and the magnet bar takes three more holes in a row higher up, 3" (76.2 mm) apart. It fits standard pegboard with 1/4" holes on 1" spacing, and I tested it on 3/16" thick board. It is not for IKEA Skådis or other slotted boards.
Printing it on its bevel
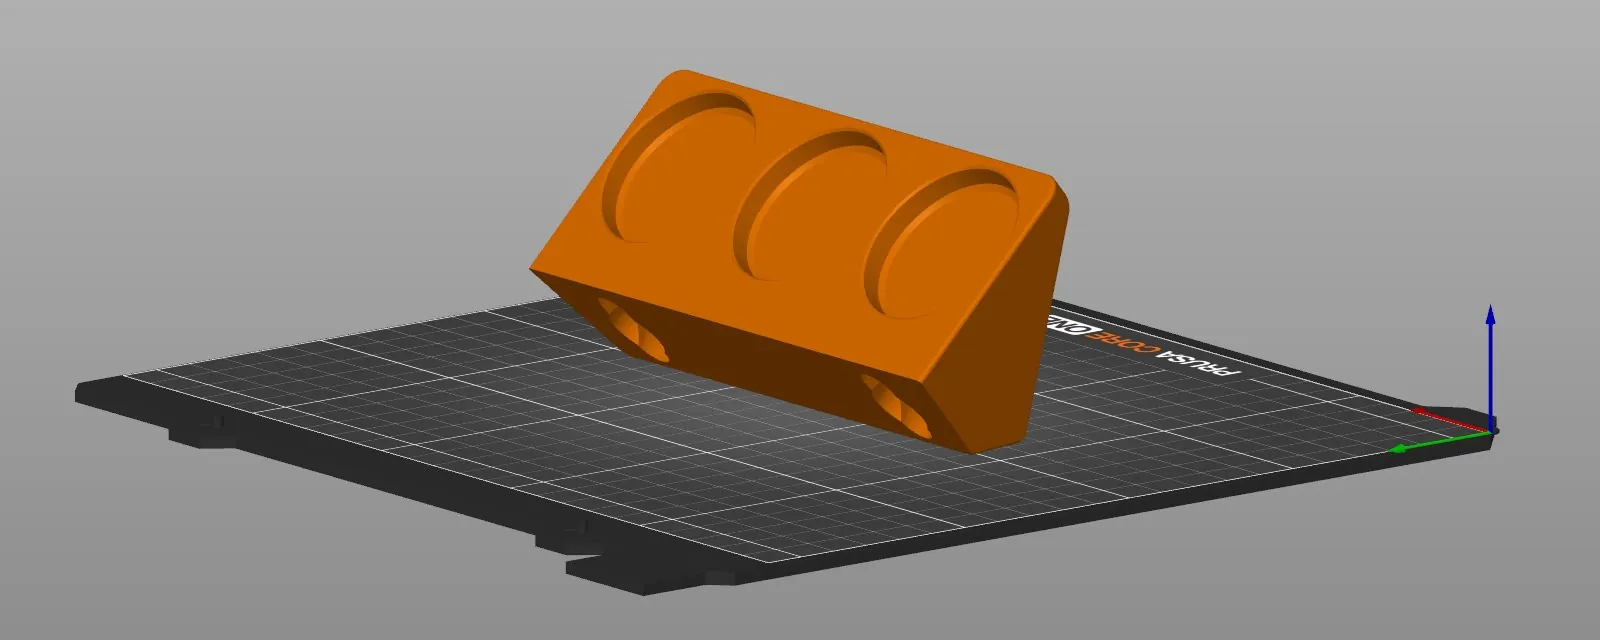
The bottom edge of the back has a 45° bevel. The rack prints standing on that bevel, so the countersinks face up at 45° and the keyhole slots face down at 45°. That way it prints in one piece with no supports and no brim.
I printed mine in white PLA on a Prusa CORE One with a 0.4 mm HF nozzle and the stock 0.25mm BALANCED profile in PrusaSlicer 2.9.6. PrusaSlicer estimates 1 hour 14 minutes and 57 g for the rack. The two screws add about 9 minutes and 2 g. If you also print the magnet bar and its three screws with this profile, that's about 55 minutes and 30 g more. The Printables page has the full settings and my config file.
What else you'll need
- My magnetic tool holder bar, with its 13 magnets (1/8" x 3/8") and three printed screws. The bar's post has the magnets I used.
- Two more printed screws for the rack. The screw file is on the bar's Printables page, so print five in all.
- A flat-head screwdriver to drive the printed screws.
Putting it up
- Pick two holes in one row, 4" (4 holes) apart, for the rack.
- Start a printed screw in each hole. The tapered tip centers it.
- Turn each screw in with a flat-head screwdriver until the underside of the head touches the board. Stop there, because plastic threads strip if you overtighten them.
- Line up the wide ends of the keyholes on the back of the rack with the screw heads. Push the rack flat against the board, then slide it down until it stops.
- Hang the magnet bar above the rack, centered over it: its middle screw goes in the column halfway between the rack's two screws. How high depends on the length of your chisels and their handles, because the steel above each handle has to reach the magnets.
- Stand your chisels in the countersinks and lean them back onto the magnets.
To take the rack down, lift the chisels out, then lift the rack up and pull it off the screws.
I drew it in SolidWorks. If you want bigger countersinks or room for more chisels, the STEP file and the SolidWorks part are on Printables.
More pegboard holders
These use the same or similar printed screws:
- A magnetic tool holder bar for 1/4" pegboard
- An epoxy & glue bottle holder for 1/4" pegboard
- A swing-out screwdriver arm for 1/4" pegboard
- A screw-in pegboard holder for a driver set
Get the files
Magnetic Chisel Holder for 1/4" Pegboard on Printables. It is free under a Creative Commons Attribution-NonCommercial license. If you print one, please post a Make there and show which chisels you keep in it.