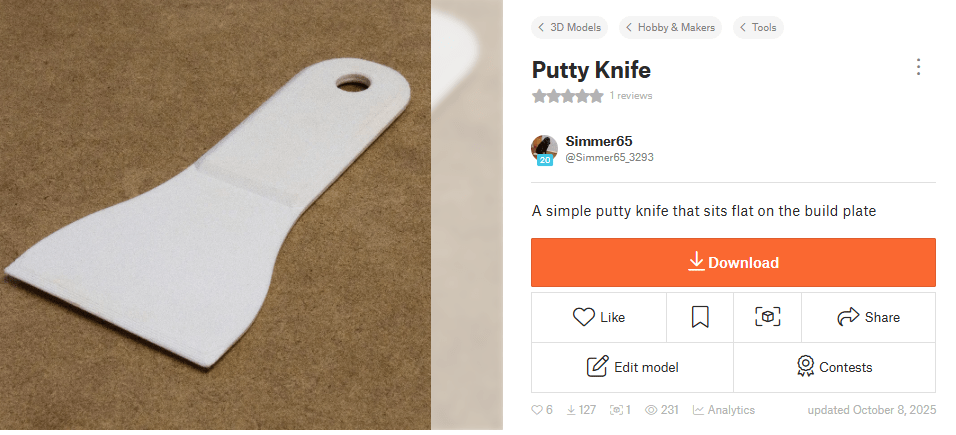
I Saved $49 in 30 Minutes (I did the math for you)
I needed a putty knife at work. No big deal, right? Wrong. Instead of burning an hour and $58, I sketched one on my tablet, traced it in Blender, and 30 minutes later I had a perfectly usable tool in my hand.
A while back, I purchased a GAGE-IT from Home Depot. It’s a handy little tool made from a thin sheet of durable plastic, designed to quickly measure drill bits, bolts, and wire diameters.
I started posting to Prusa’s Printables. You can trade in reward points for filament, Prusa merchandise or voucher’s for a new 3d printer. If you are very popular, I suppose it is possible to accumulate enough points to earn a new 3D printer.
I currently have 12 models posted and have 130 reward points. A roll of filament is 350 points. A Prusa mini is 10,000 points and a Prusa MK4S is 25,000 points.
I am 0.5% of the way to a MK4S. Every journey starts with a first step.
I plan on using this site to post my models that are designed to be 3d printed. Models that are for rendering will still be posted to CGTrader.
In the Shader Editor of Blender, holding down the Shift key while right-clicking and dragging on a link between nodes combines all of the links that cross the selection area into a single, curved link.
This can help to reduce clutter in your shader network and make it easier to see the relationships between nodes. By combining links in this way, you can simplify your shader network and make it easier to understand.
To use this feature, simply hold down the Shift key while right-clicking and dragging over the links you want to combine. The links will become curved and grouped together, reducing clutter in your shader network.
So give this quick tip a try the next time you’re working in the Shader Editor of Blender and see how it can help to simplify and improve your shader networks!
Today I finished a wooden trellis. It’s a design similar to one I found in one of my wife’s catalogs. I might actually make this one. I need something for my tomatoes to grow on.
It did not take long for me to create the model in Blender, but it took some effort to convert it to a single mesh and game ready textures.
The Garden Trellis is available for download at CGTrader.com
Today I received an air pressure regulator that I will be using in an industrial brake. The brake has a pneumatic powered oil pump.
I first made the model in Solidworks. It was exported as an STL. This makes a horrible mesh for Blender. Triangles aren’t necessarily bad, but long triangles with sharp corners are not good.
I recreated the mesh by over the top of the imported file and then shrunk it down on the surfaces of the imported model. I then created material map files. For this model, I made a diffuse map, a metallic map, a roughness map and a normal map.
Sometimes it hard to tell if a product shot is a photograph or a CG render. Part of the problem is the quality of modern rendering. But I think there is an overlooked aspect. So many photos are “Photoshopped”. People have become accustom to seeing perfect pictures….no scratches and no dust.
Photographers might want to leave some of the imperfections in their shots.
I created a CGTrader account years ago. My first submissions were all free. I wanted a way to give back to a community that had help me learn Blender. And then one day I saw a post on the user forum. Someone was complaining because the models were under priced. They were seeing a drop off in sales and believed it was because more content was being offered for free or for a very low price. Continue reading “CG Models”
I have seen so many non-US designers condescendingly scoff at Americans for using Imperials units. I’ll admit, the metric system has an advantage. It is much easier to work equations on a calculator when you stay in metric units.
But I wonder how many of these people actually build anything.