

A classic song lyric goes,
And I went down to the demonstration
You Can’t Always Get What Your Want by the Rolling Stones
To get my fair share of abuse
We’re gonna vent our frustration
If we don’t, we going blow a 50-amp fuse
I wasn’t frustrated, but I beat them by 10 amps. This week I blew a couple of 60 amp fuses. As a reminder that I need to order more spares, I have two blown fuses on my desk. I decided that they could be used to test what kind of results I can get modeling with photogrammetry. I get questionable results when I have labels that are on a cylindrical surfaces. Since your eye knows what to look for when looking at text, texture errors in the labels really stands out.
The following story is about how I converted the photogrammetry model into a good mesh with good topology. If you’re interested in how I messed up and blew a couple 60 amp fuses, then jump to the end.

To start with, I put the fuse standing up on one end on a desk in my office. There is a big window on one side. On the other side, I set up an LED light strip. This gave good lighting from two sides.
I took 84 photos with my iPhone all around the fuse. The photos were imported into Zephyr, and I created a sparse point cloud with the default settings.

Before moving ahead with the dense point cloud, the sparse point cloud was rotated to be more inline with the XYZ coordinate system, and then I used the bounding box to limit the amount of points it would use for the dense point cloud and mesh.

After creating the dense point cloud with the default settings, I manually removed some of the points. With the dense point cloud more focused on the fuse, I used the densification function to increase the density of the existing point cloud.
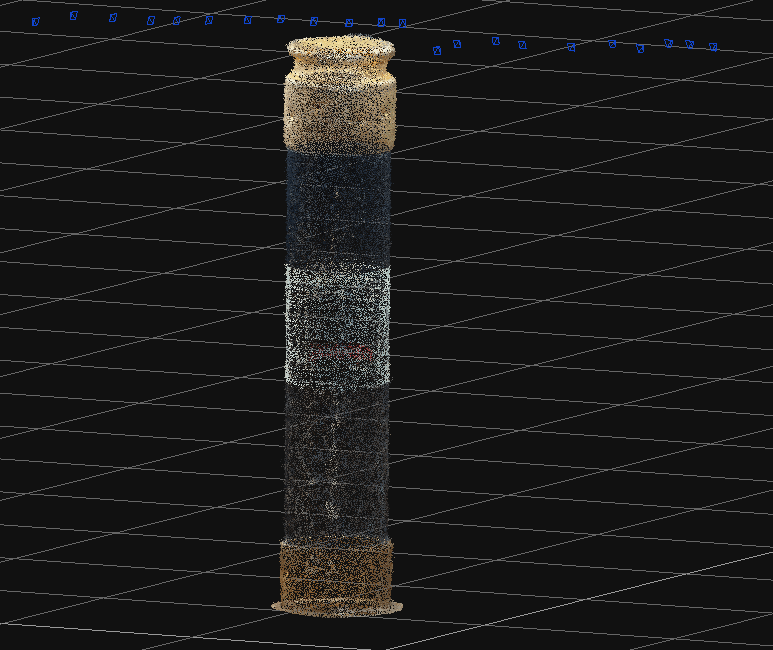
Then I created a mesh. Again, I used the default settings.

While all this was happening in Zephry (photogrammetry takes a lot of computing time), I was modeling the basic shape of the fuse in Blender. I used dial calipers to measure the fuse. It’s a pretty simple geometry, so it didn’t take long.

With the Blender model created and the Zephyr mesh ready, I exported the Zephyr mesh as an STL file. I imported the STL file in Blender. It is important to import the model with the proper import settings in this step. In the “Transform” properties, the Forward directions is Y+ and the Up direction is Z+.
Now Blender has two fuse models. The untextured model has clean geometry. The imported Zephyr model has the textures, but the geometry and topology are a mess. It also has weird bumps and dimples. It is important not to move the textured model in Blender. You can lock the transform location in the Object Properties panel to make sure of it.
I moved the clean geometry to the textured model, scaling and rotating it until it lined up closely. I then modified the clean geometry so the details lined up with the textured geometry.

Now export the clean geometry as an STL file, again making sure that the forward direction is Y+ and then up direction is Z+. Now back in Zephyr, import the clean geometry created in Blender. It should line up with the mesh created earlier only it won’t have any colors.

Run the “Make Structured” function on the imported mesh. This will apply the photos onto the mesh. Then run the “Create Texture Mesh” for the final photogrammetry mesh. Export this mesh as an OBJ file.

Import the OBJ file into Blender. It should be located in the same place as the simplified untextured mesh created earlier. Parent the two models together with the simplified untextured mesh as the parent and the Textured mesh from Zephyr as the child. Select the parent and reset the position, rotation and scale using Alt-G, Alt-R and Alt-S. Make the textured mesh active and unparent it from the simplified mesh, making sure to apply the transforms.
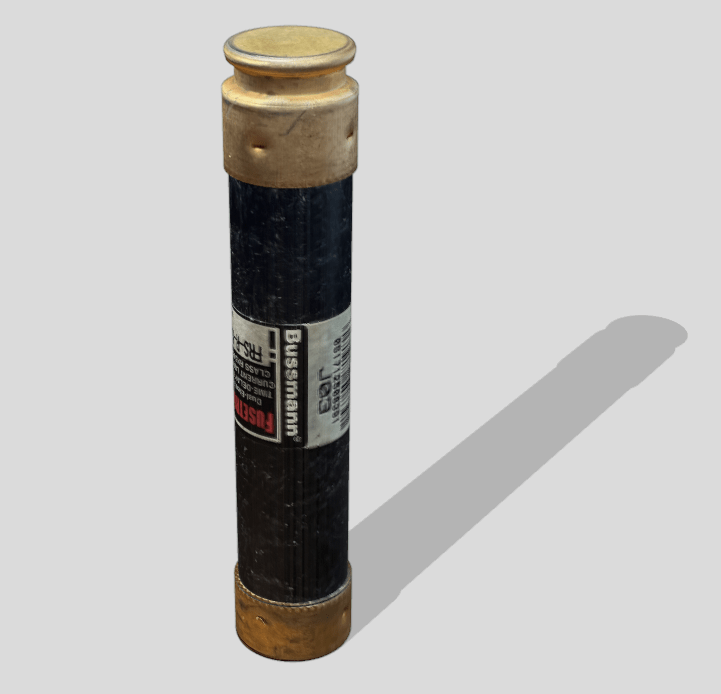
Add some seams and unwrap a UV map to the untextured mesh. Create a material for the the mesh and then bake the textured mesh created in Zephyr onto the simplified mesh.
Add some lights and a back drop and I have a new model for CG Trader:
https://www.cgtrader.com/3d-models/industrial/other/60-amp-fuse
So how did I blow a 60 amp fuse?
Our shop has a wash tank. The tank holds water with a cleaning agent in it. It gets heated to 160 deg. F. The temperature controller on it failed.
We have 4 other pieces of equipment that use temperature controllers: 2 ovens and 2 centrifugal Babbitt casting machines. They all use Auber temperature controllers. The wash tank used another controller that is now longer being manufactured. You can buy one on eBay, but I decided the better option was to change the wash tank to use an Auber controller. This would allow me to keep only one spare controller in stock.
The controller has one big difference. The one in the wash tank controlled an contactor and the Auber controller control a solid state relay. For the upgrade, we removed the contactor and installed the 3 phase solid state relay on a heat sink. The contactor was rated for 40 amps, so I purchased a 3 phase solid state relay and heat sink rated for 40 amps.
We turned the dip tank on and after a short time, the solid state relay basically exploded. It over heated. Obviously, we need to update the fuses to the dip tank. The fuses should be rated lower than the solid state relay (but that wouldn’t have helped in this case).
The reason it over heated was because I purchased a heat sink for 40 amps…SINGLE PHASE. The dip tank uses 3 phases so the heat sink needs to dissipate 3 times the heat.
I bought a new solid state relay and a new heat sink. The new heat sink has a fan. We cut a hole in the side of the control box. The heat sink and fan are outside the box and the solid state relay is inside the box.
We ran the dip tank all day and there were no explosions.
