

Photogrammetry is a cool technology, but it’s difficult to get a usable model. Most of the models I make have large holes or areas where the mesh is way off. Where the model is not way off…there is usually a tight mesh that isn’t required. Next…there are the shadows. Photogrammetry adds the lighting from your photo shoot to the model and this isn’t desirable (unless you are duplicating the lighting…which basically never happens).

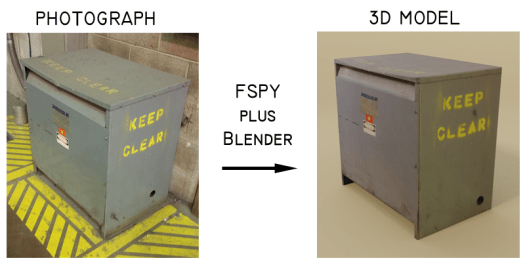
For this model of an industrial transformer, I used a smart phone, FSpy, Blender and Materialize.
FSpy uses the vanishing points to calculate the camera angles. You can define the scale and direction and origin of the coordinate system. These numbers can be imported into Blender to create a camera location.
Tutorials:
FSpy YouTube Video by CGMatter
Materialize YouTube Video by Gamefromscratch
Here is a short outline of the process:
- Take a photo from different angles. Note that FSpy uses the vanishing points. Set up your photos to exploit this. A shorter focal length is better. A short focal length with accentuate foreshortening and the vanishing point.
- Load the a photo into FSpy and save as an FSpy file.
- Load the FSpy file in Blender and add a simple shape that lines up with the photo.
- Bake the photo onto the model.
- Use the remaining photos to paint (clone) the other sides of the part onto the model
- Export the texture out of Blender and use Materialize to create texture maps (diffuse, metallic, roughness)
- Import the texture maps to Blender and create the final materials
