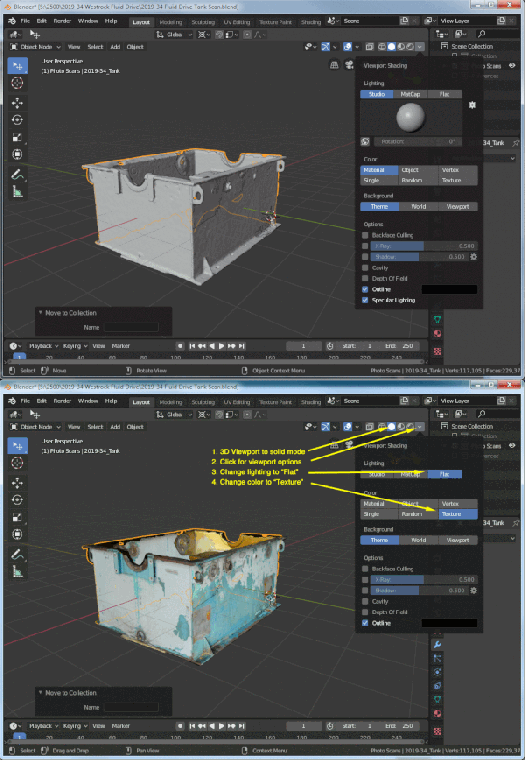
Photogrammetry scans already come with their own lighting. When using these scans in Blender, you can get a natural look and speeds up Blender with a few clicks.

- Put the 3D viewport into the solid mode. You can click the solid circle in the upper right corner or hit the “Z” key and then slide your mouse to the right.
- Click the shading option arrow next to the shading modes in the upper right corner
- The lighting default is “Studio”. Change it to “Flat”
- The color default is “Material”. Change it to “Texture”
